
Technical

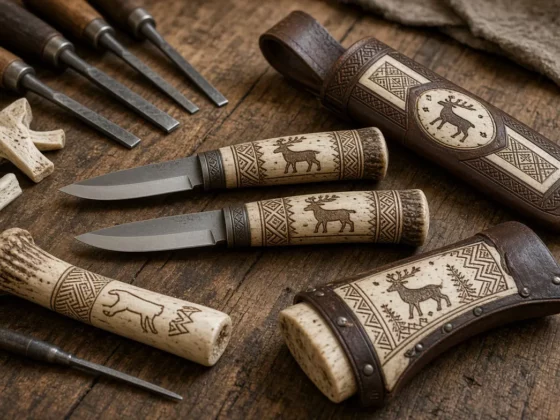
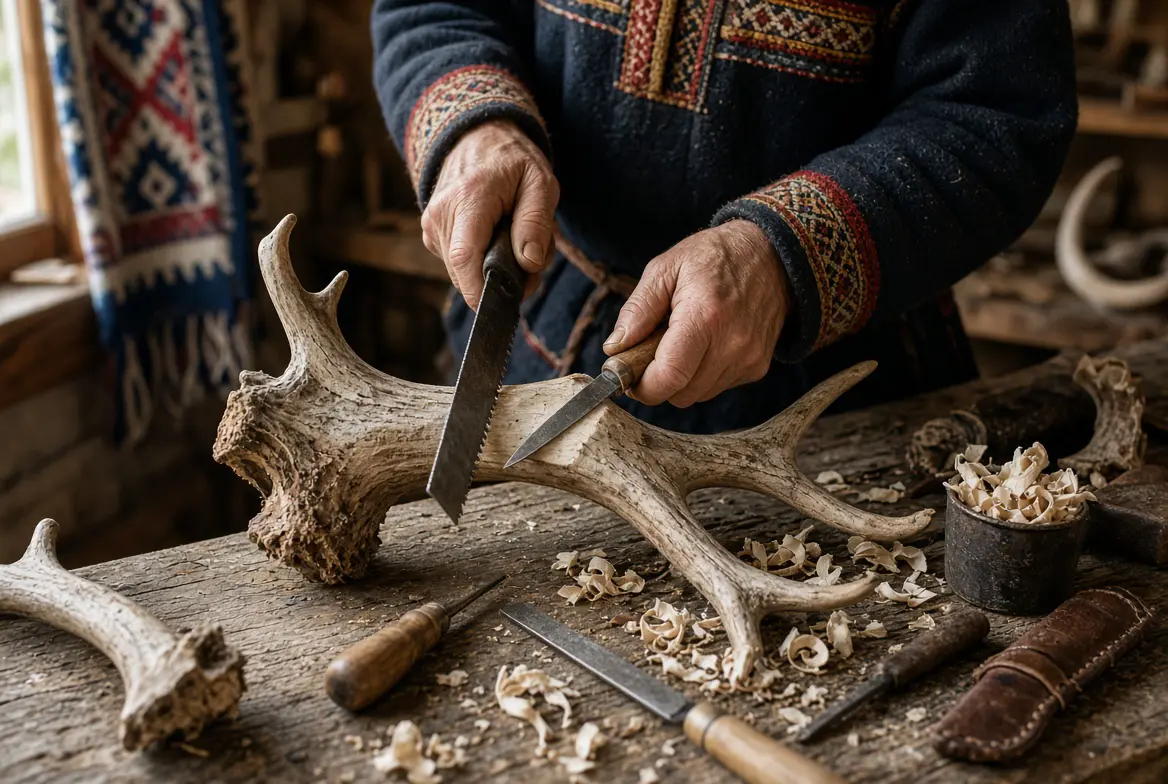
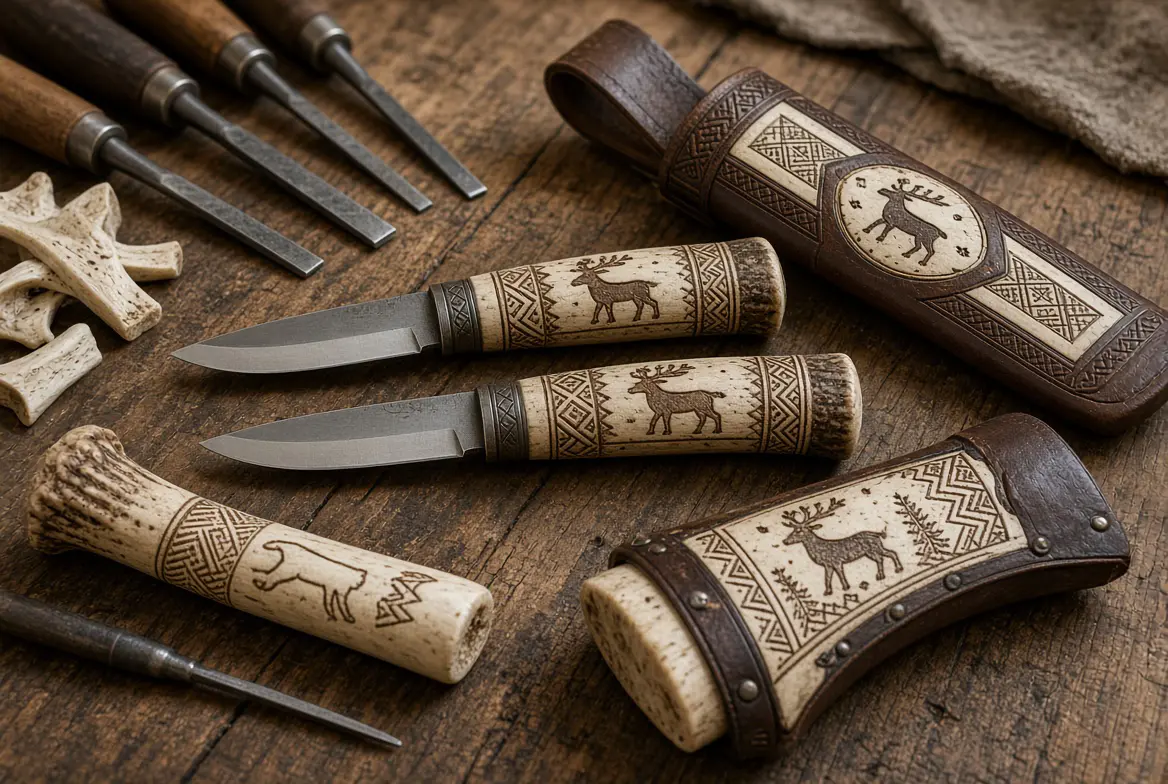
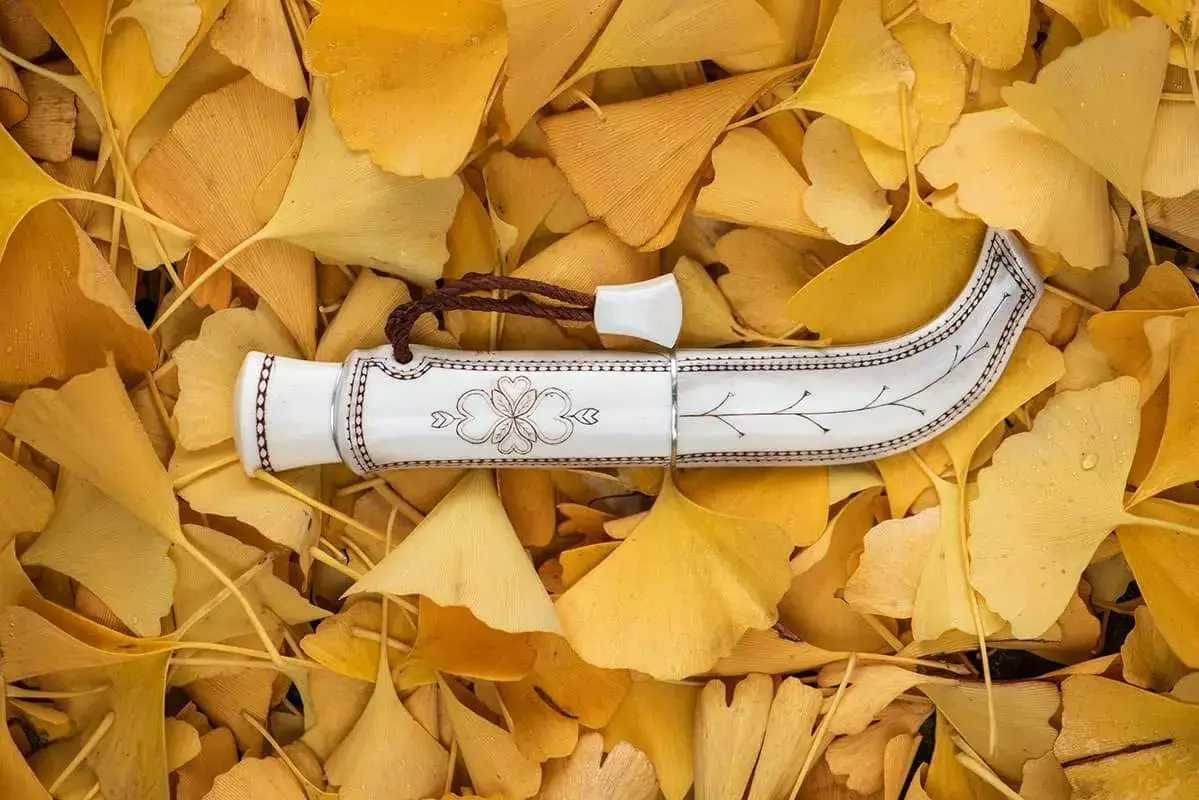
Original engraving on reindeer wood and bone: Sami techniques for handles and sheaths of puukko

Original engraving on reindeer wood and bone: Sami techniques for handles and sheaths of puukko 1168 784 Puukko - Finnish knives


Burning techniques on reindeer wood and bones

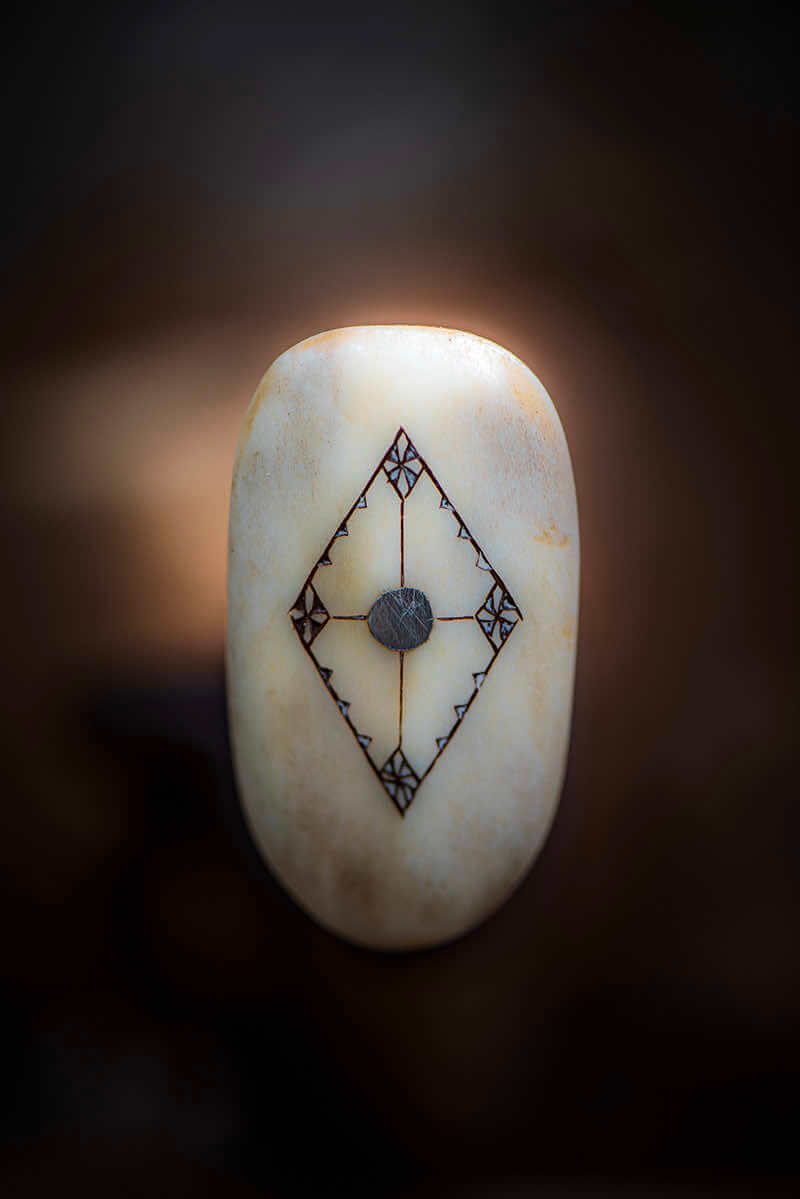
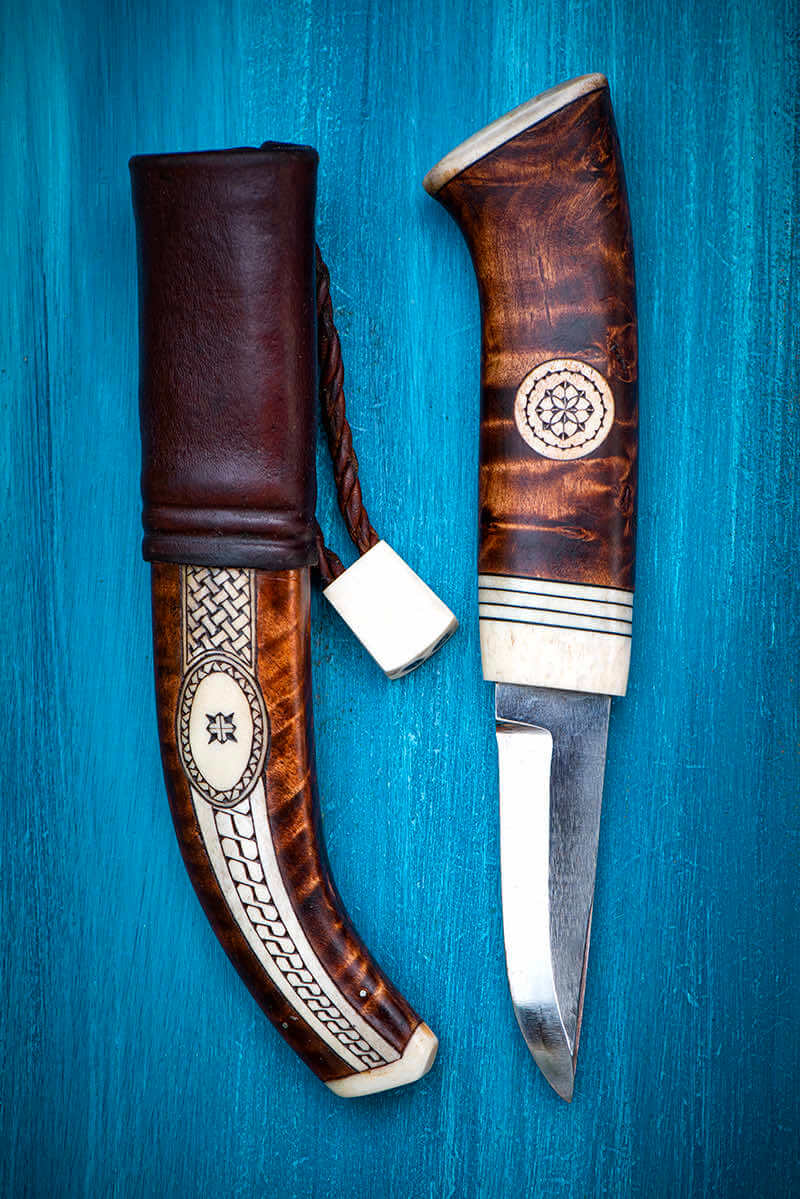
Renal wood and northern bone adorn handles, sheaths and interlayers of the most beautiful puukkos. Two dense and brittle materials: the line remains fine, the razor tool, the light pressure. From the sami trail to the scrimshaw pointillism.

Step by step summary before discovering details

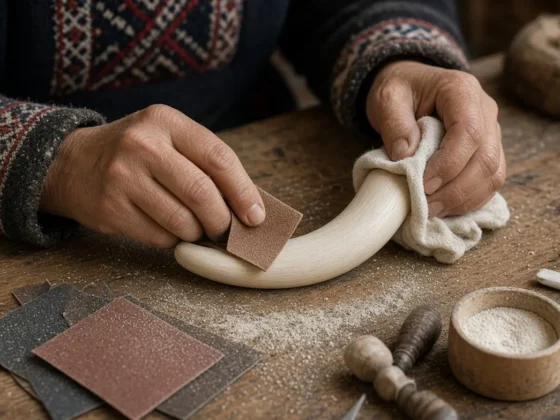
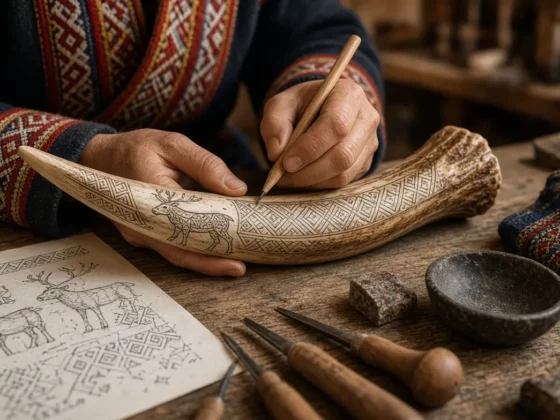
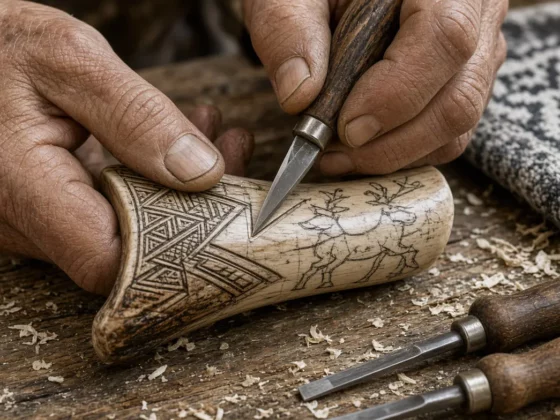
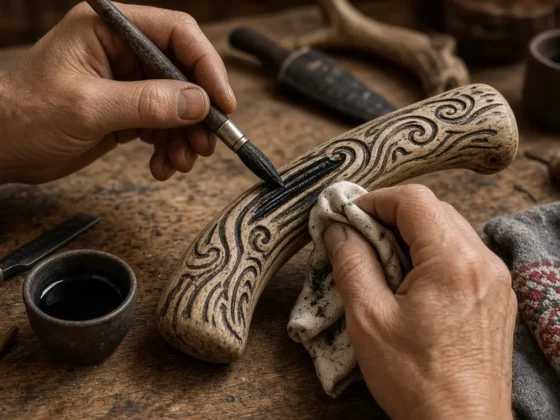
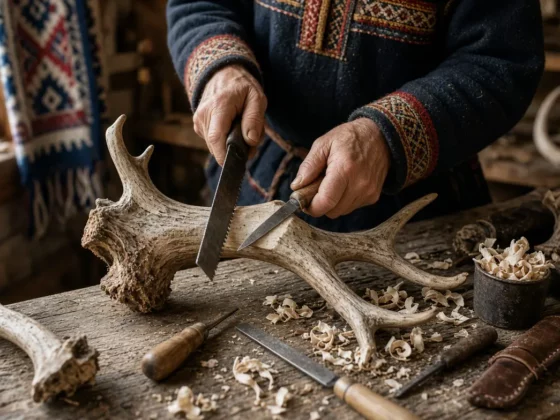
Illustration images generated by Grok-Imagine

Material

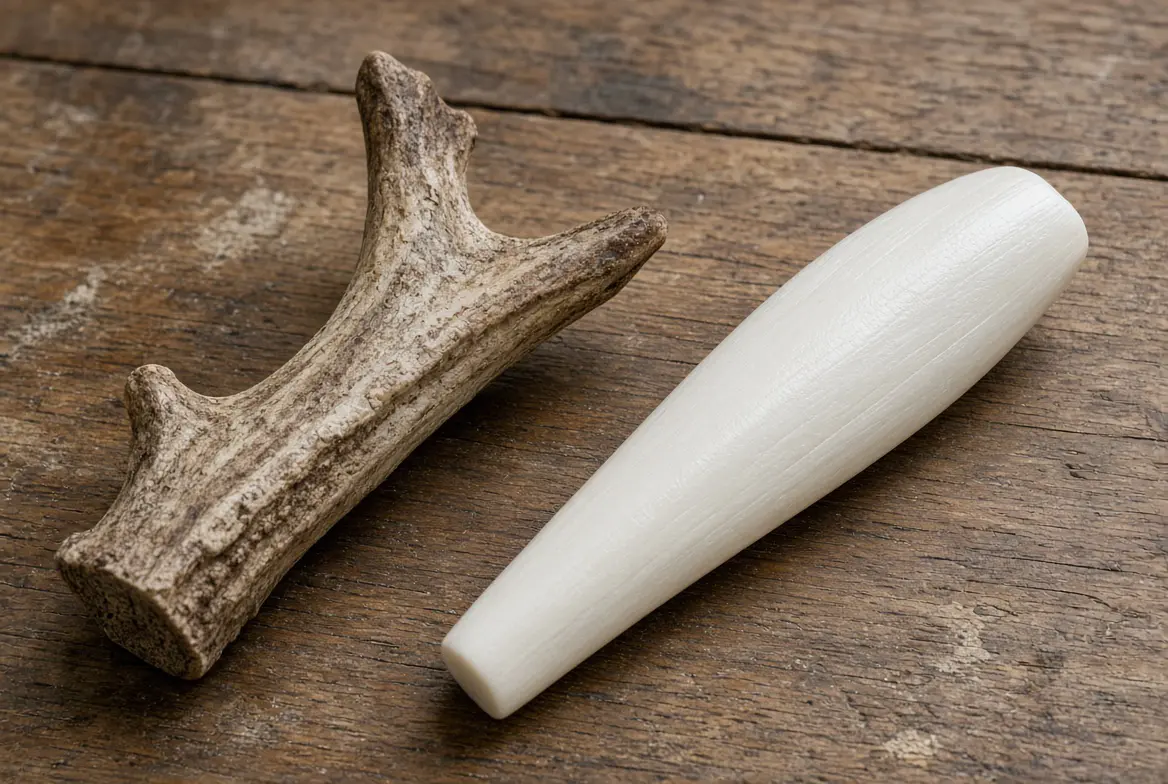
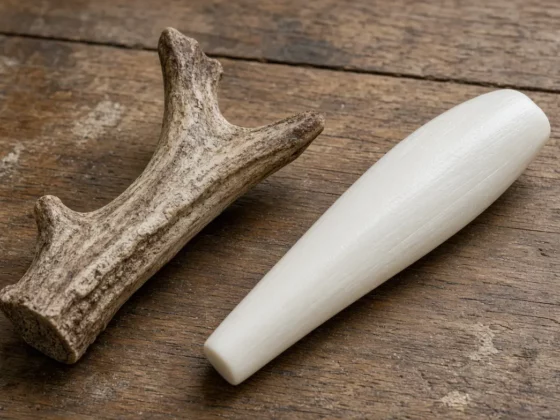
The reindeer wood (poronsarvi) and the northern wood (renne, moose) are used for handles, sheaths, interlayers and decorations of puukkos. The reindeer wood is hard, dense and somewhat brittle. It is denser, whiter once polished, almost without visible grain, and splits even more easily. Both require an ultra-sharpened tool and a light pressure.

The reindeer wood is not horn. It's bone, pushed every year and then fell. The horn is keratin and does not fall. In reindeer, males and females bear wood: the male loses them after the rut, around November-December; The female often keeps them winter, useful for access to food. Under velvet, wood is alive and irrigated; Once the velvet is rubbed, late summer, it is mineralized, especially calcium and phosphorus.

In Finland, the subject comes from two sectors. The cutting wood, recovered from the cutting, and the moulted wood collected, the jättösarvet. We harvest over 100 tons a year. The duojár sort: whole male wood (hirvas), the densest and most useful, especially the base near the skull, for shrouds, lasso rings, large pieces; female or young wood, smaller; Castrated male wood, usually large but porous and brittle. Food reads in the cup: poor food, broad spongy heart, little dense matter to burn. Nothing flows; falls are used for interlayers and trials.

The handle is not a fallen wood. It comes from the animal slaughtered, reindeer or momentum: cannon, metapod, sometimes tooth. Whiter, more homogeneous, more brittle. It must be degreased, dried for a long time, occasionally bleached.

Retention: dry, stable, sheltered from cracking gel and dry heating. An already dry moult wood keeps itself as it is, cleaned of the earth, without early varnish. Fresh bone must lose its fat before being worked, otherwise the stain comes out months later. Once mounted, oil or wax nourishes; hot water and heat shock open the old cracks.

Rating

Reindeer wood Wood falls every year; Is from the animal; Elephant ivory is prohibited (CITES). Mammouth and micarta are substitutes, not ivory.

© Collection Bertil Fällman


Preparation

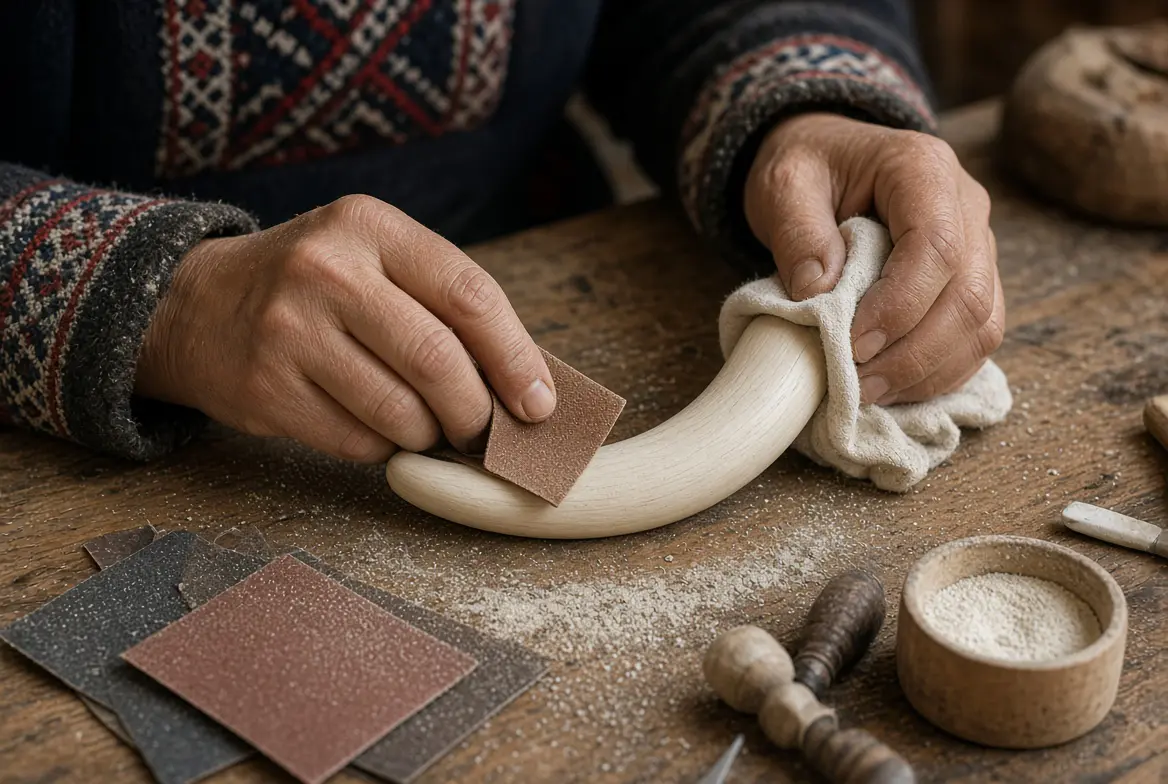
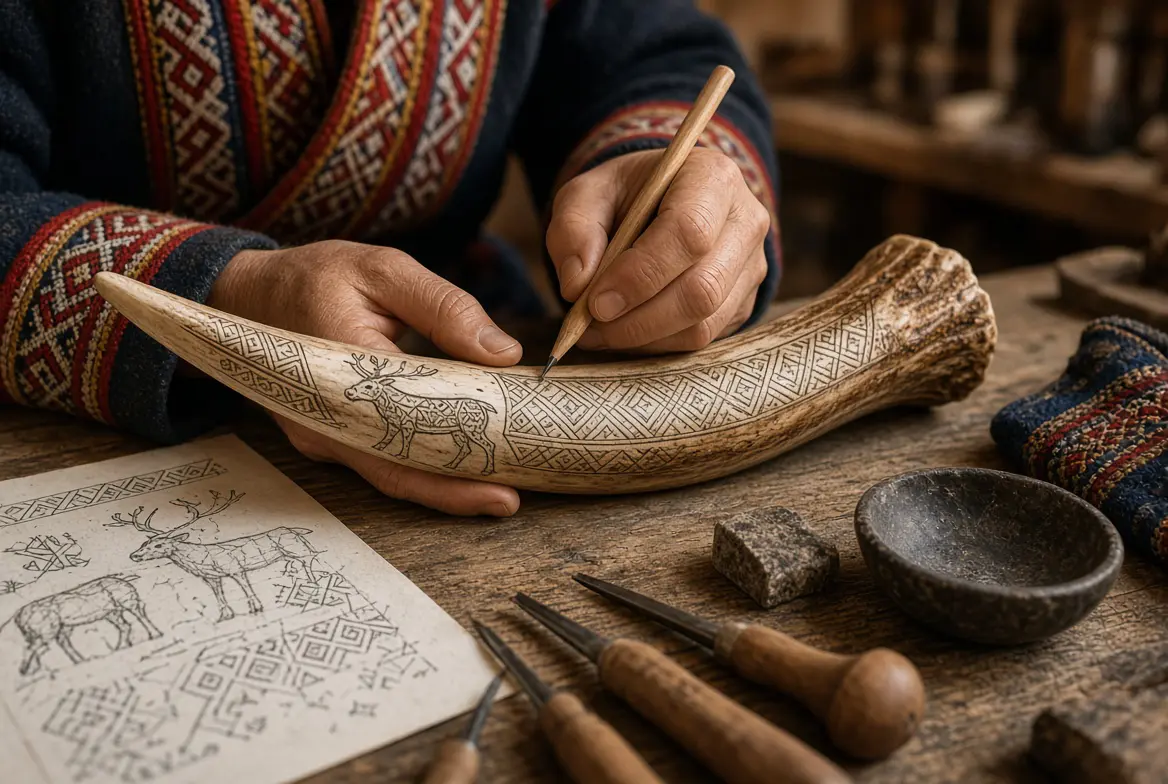
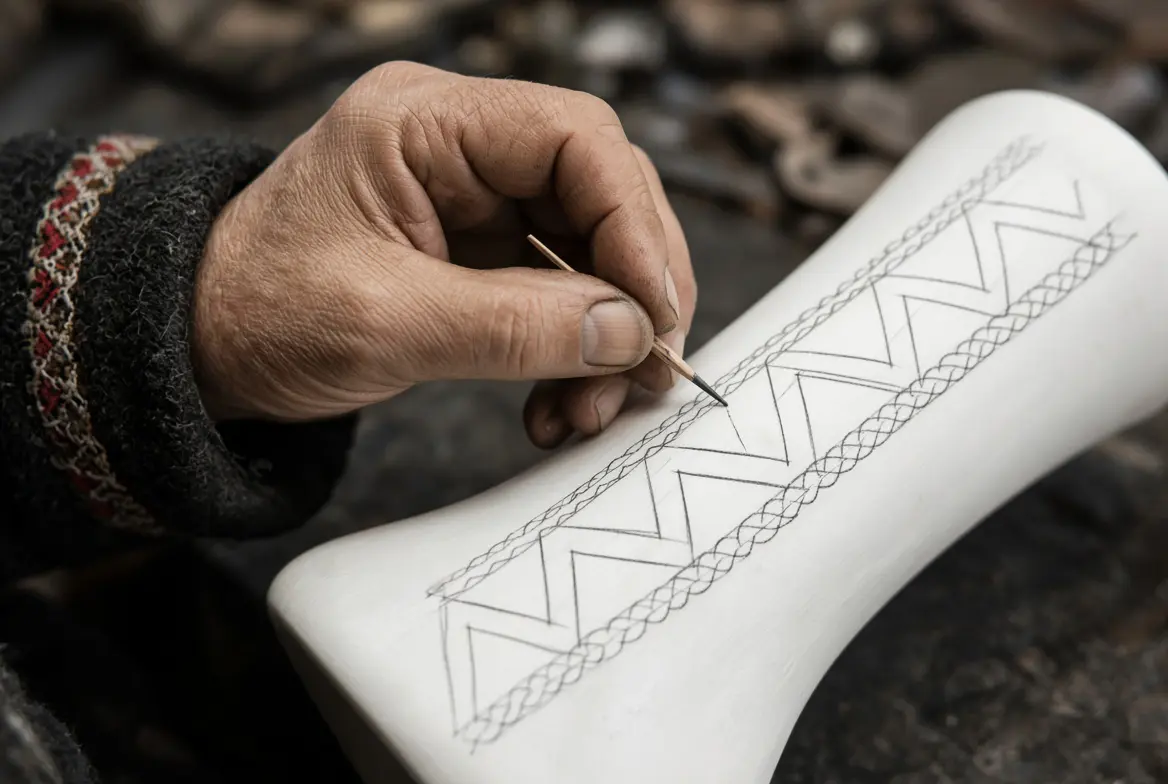
Choose a dry room, without cracks. Degrease and, for bone, bleach if necessary, then dry for a long time. Sand up to a smooth surface: grain 400 to 800 for reindeer wood (matt appearance), 600 to 1000 or more for los (gloss appearance). For the scrimshaw, polish to the mirror: the first shading has the slightest scratch. A slight passage of clear pigment reveals the defects. The unmounted room can be moistened or heated very gently to soften a little. Trace fine pencil (medium hardness) or eraseable pen. On a very clear surface, a watercolor touch helps to see the drawing.

Rating

Reading a room: Sami furrow (continuous) against scrimshaw (points). Don't call anything scrimshaw.
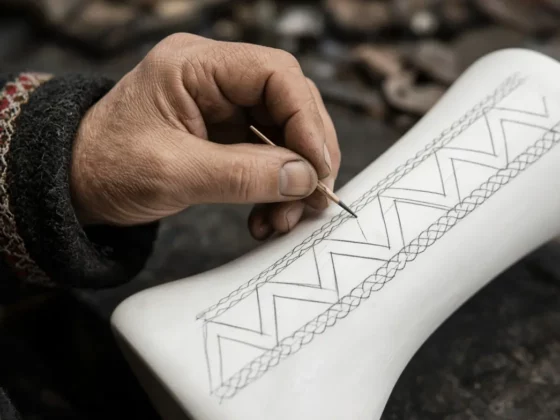
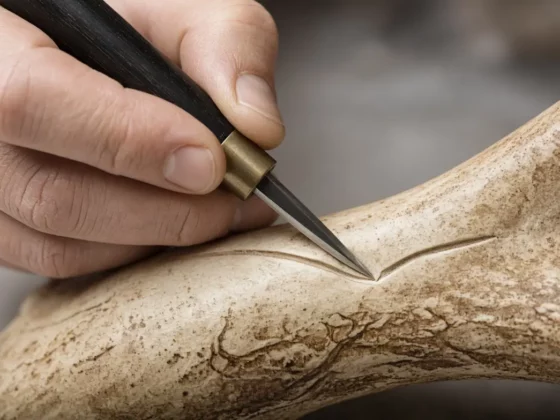
Linear engraving (classic Sami style)

Most common technique on reindeer wood and bone.
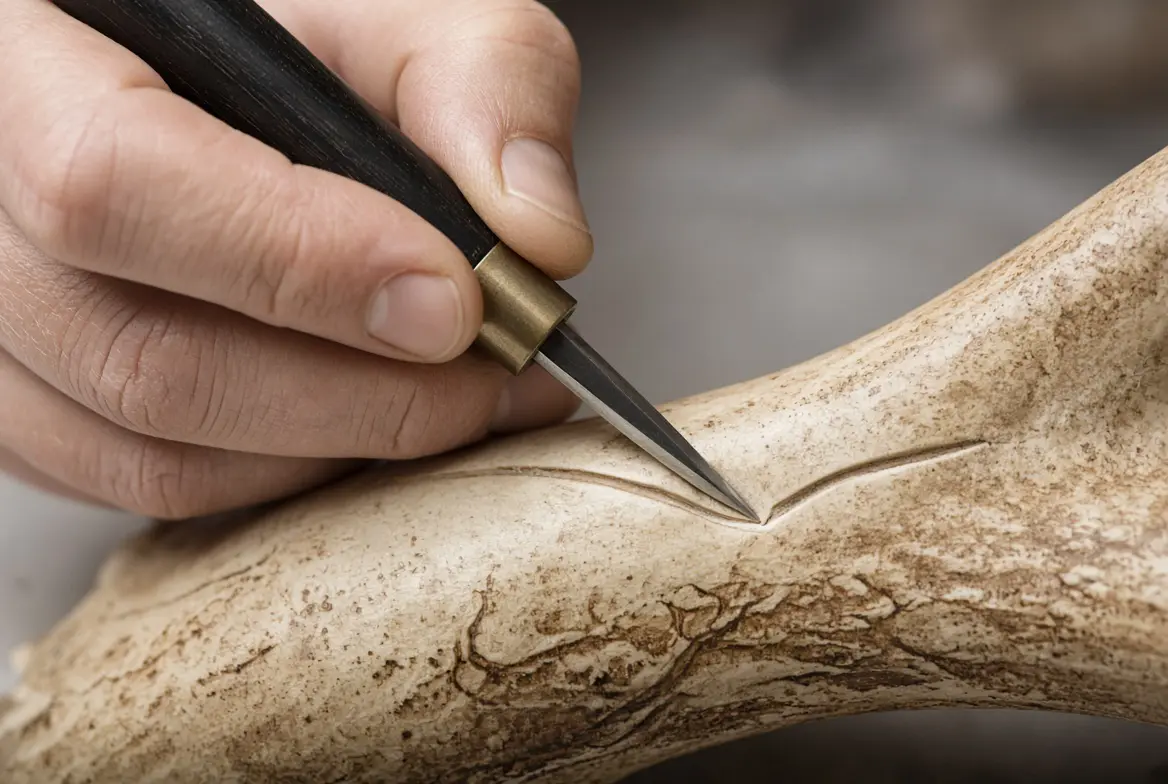
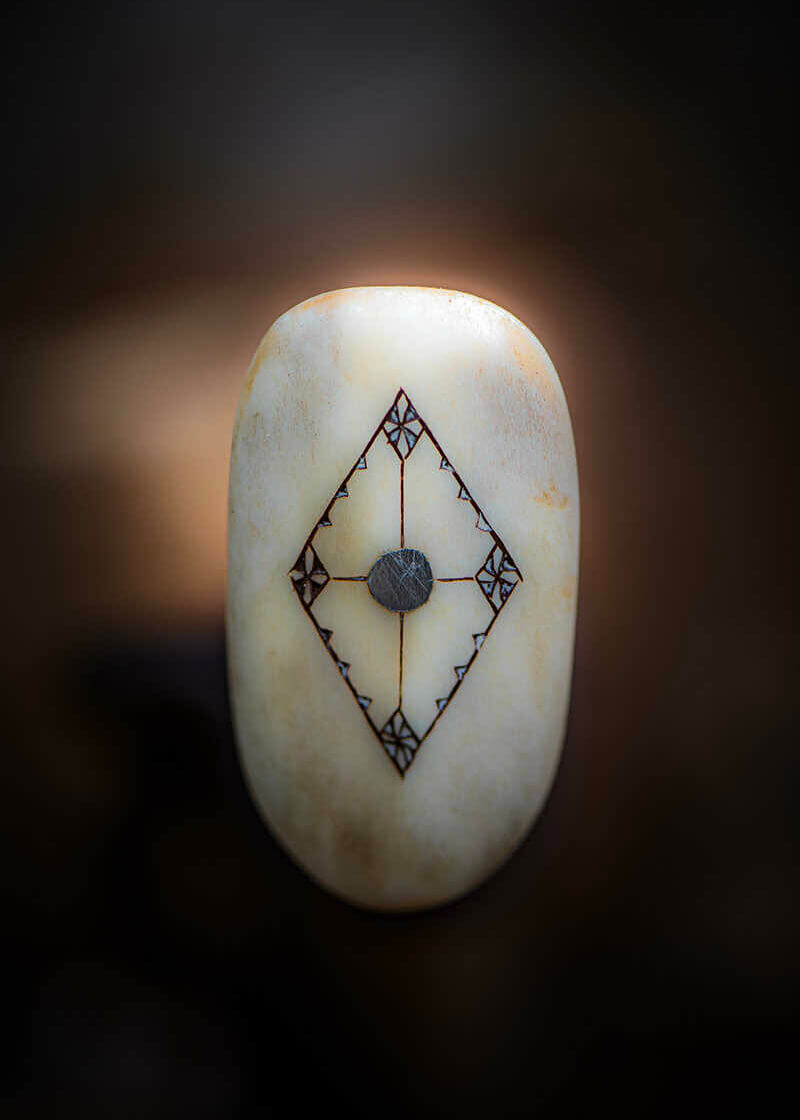
V engraving (kolrosing / carving) with a pointed tool, often ink or black/brown paint to bring out grooves, then polishing.

  • Tool: very sharp engraving knife, tip of puukko Well sharpened, or jeweler tip. Hold like a pencil. Push the tip along the line for a fine V-row (0.2 to 0.5 mm on reindeer wood, 0.1 to 0.3 mm on bone), then iron reverse to clean. More inclined knife for a wider line, almost vertical for a very fine line.
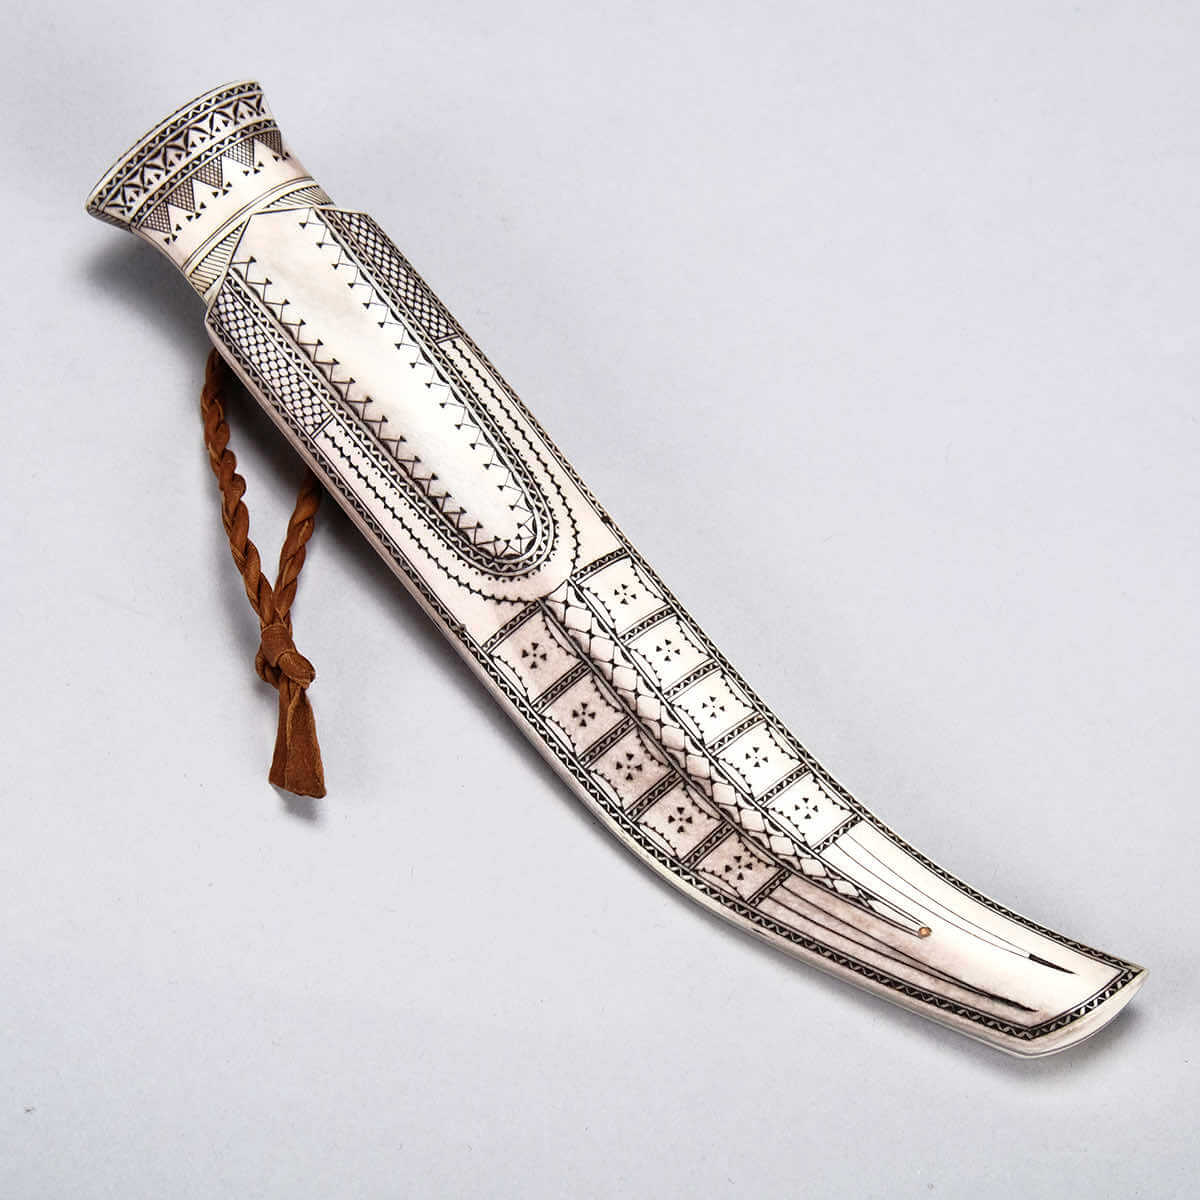
  • Reasons: zigzags, braids, diamond, stars, hearts, rope edges; More frequent stylized flowers in northern Lapland.
  • North Sami: flowers and stars. Center and South-Sami: braided and narrower geometry.


Chip carving

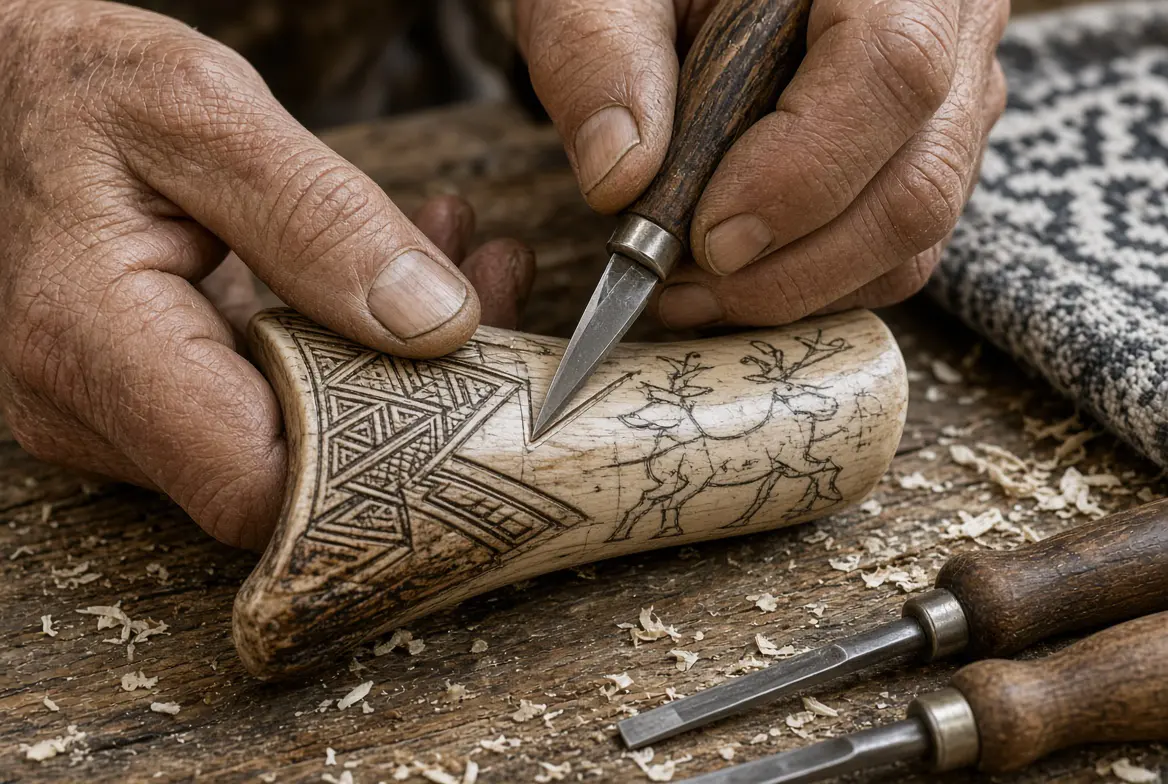
For borders and relief. Draw the base of the triangle or diamond, put the tip at the base and push a gesture towards the top to detach a small shaving. Repeat in regular rows. Boneless, shorter gestures: the material breaks quickly.

The chip carving, on reindeer wood or on bone, is not a sculpture in relief. It is a suite of small triangular or diamond shavings, removed at the tip, especially for edges and pattern bottoms.

First we trace the base of the triangle, I've never had a piece of paper. The tip sits on this base, the bevel slightly inclined, and only one push goes towards the top. The shaving must be clear. If it removes or bleachs the edges, the iron is soft or the angle too open. On the bone, the gesture is shorter: the material breaks before cutting.

Three adjustments are enough.

Vertical and light: narrow triangle, almost a notch. More inclined: wider triangle, more present border. Two pushes face to face, same top: diamond. Alignment counts more than depth. A 0,3 mm regular row is better than irregular relief.

It is used for twisted rope, the rows of South Sami crosses, the teeth that frame a braid, and the geometric dotilla that borders the stars and hearts of the North. The linear groove draws the pattern; the chip makes it border. The two are not confused: iron a shaving like a V-shaped trait crushed.

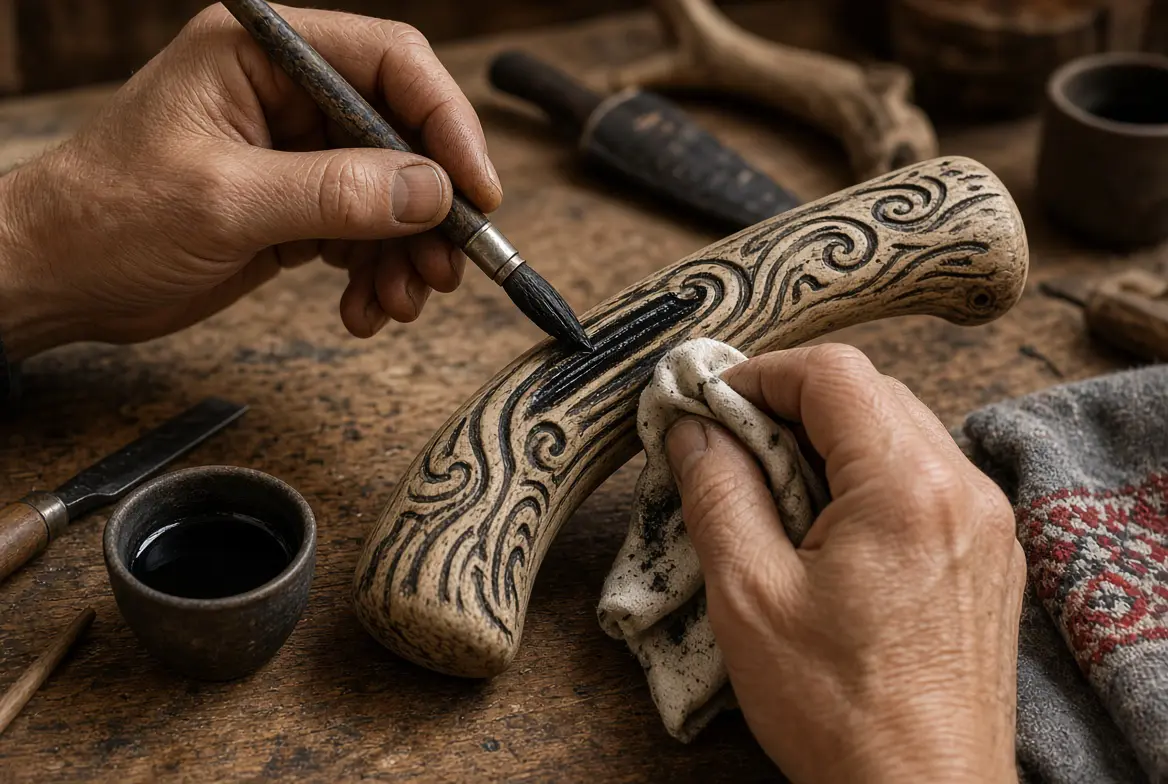
The pigment comes after, not before. It stays in the triangle angle and blackens the border without closing the bottom. Too much sanding after the blow erases the edges: only the bash is removed, with the tip of the finger or with a very fine abrasive.
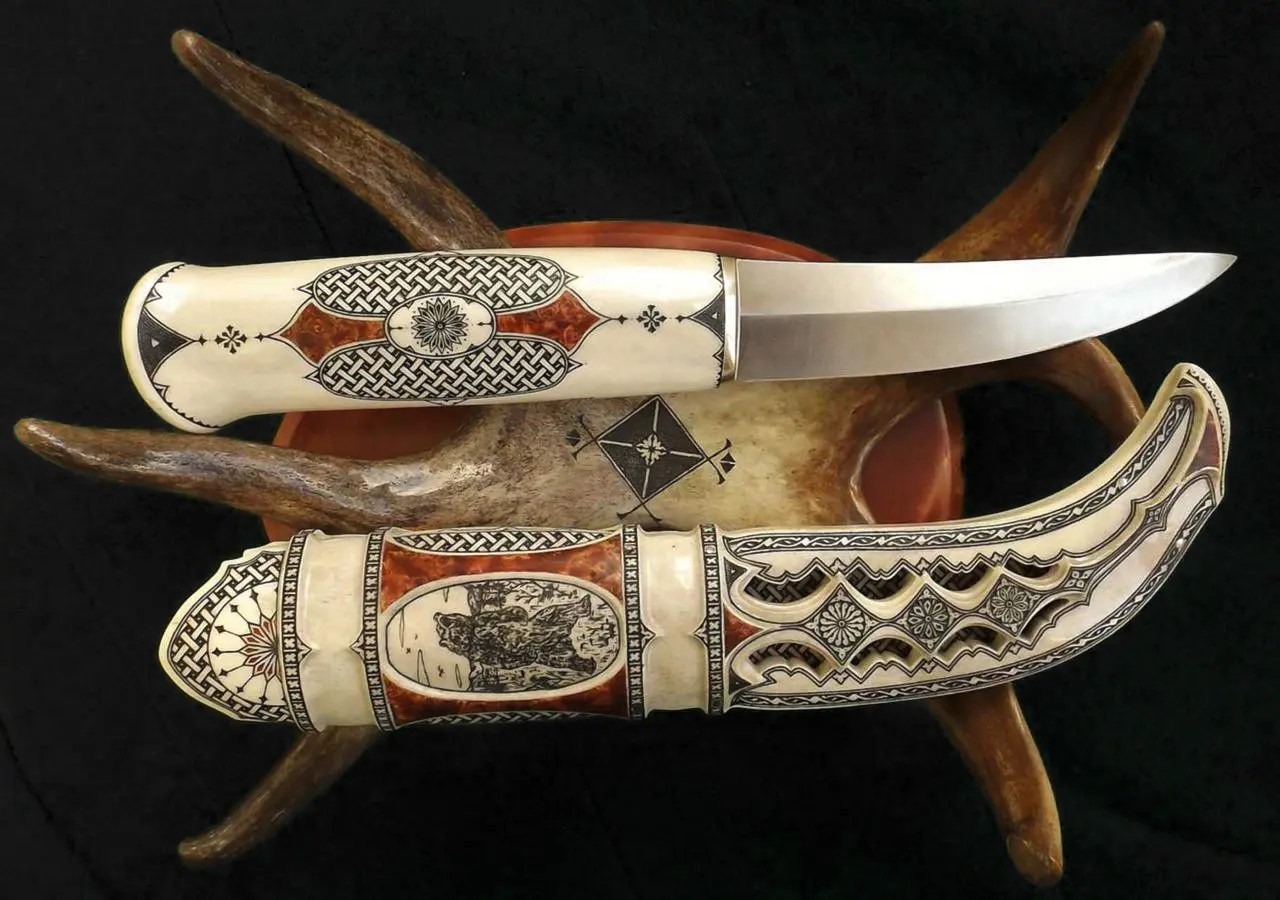

Scrimshaw (pointillism)

Point decoration technique, known to sailors on whale's fanon and walrus defence (sail needle), now common in Norway, Wales and American magazines, and practiced in Finland on bones and substitutes. Ideal: moderately hard and homogeneous bone (mammouth; elephant ivory prohibited). Also Micarta, buffalo horn (clear rendering). The beef horn is often too hard.

Sewing needle reshape on fine diamond stone. Draw up, then sting thousands of small points, first contours. Do not sting at random: the needle falls back into the previous hole and makes irregular spots. Shadows: oil paint well pigmented (or ink), from dark to light, spread with cotton swab and wiped with cotton cloth. The pigment stays only in the dots. We can recharge. More points, darker. Once laid, the color does not fade. After a few days, an antique wax colourless for water repellent.


Contrast and finish (gravure in furrow)

Scrub coal, cinnamon, roasted coffee or black or brown pigment in grooves, wipe immediately. Sometimes slightly dye the piece before engraving. Slightly sanding fine around the lines for burrs. Flax oil, reindeer oil or reindeer wood oil, or bee wax. Final polish to cloth or wool. On bone, a stronger polishing of unengraved areas brings out the furrows.

Rating

Maintenance handle engraved: Dry oil, no prolonged hot water, no dishwasher, iron a dry cloth after rain.


Drawing by region

Patterns are not a unique directory. They report an area, sometimes a family, and the rule of the Duodji is not to mix models from different regions on a single piece. You can vary within your own tradition. Geometry (line, triangle, diamond, « Weaving »), animals (rennes, elks), occasionally life scenes or floral motifs depending on the region (more figurative to the north, more geometric to the south).

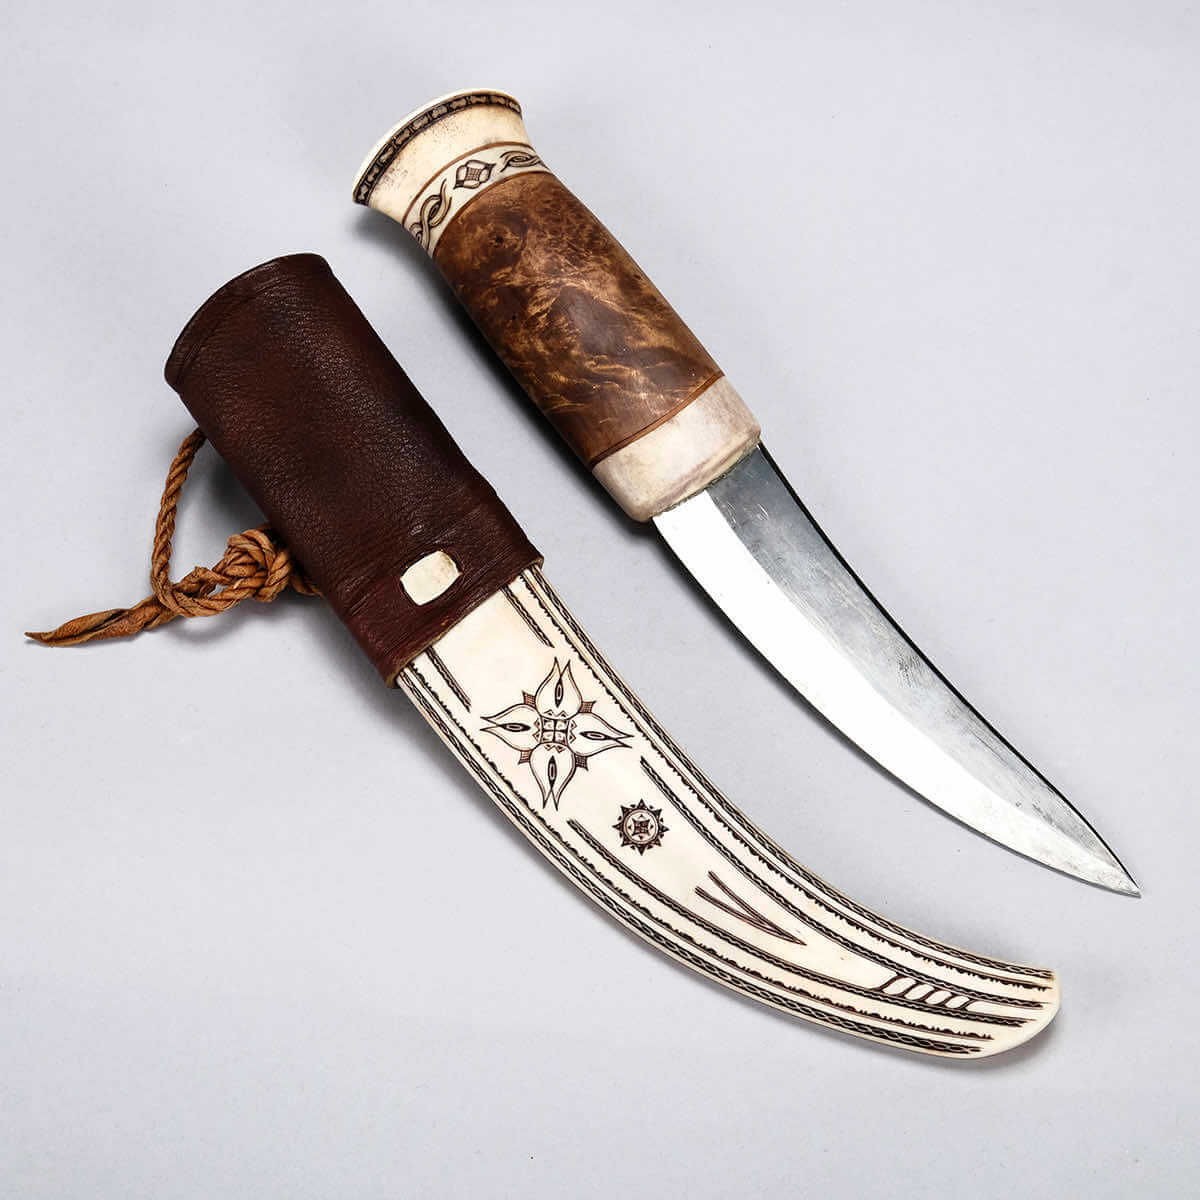
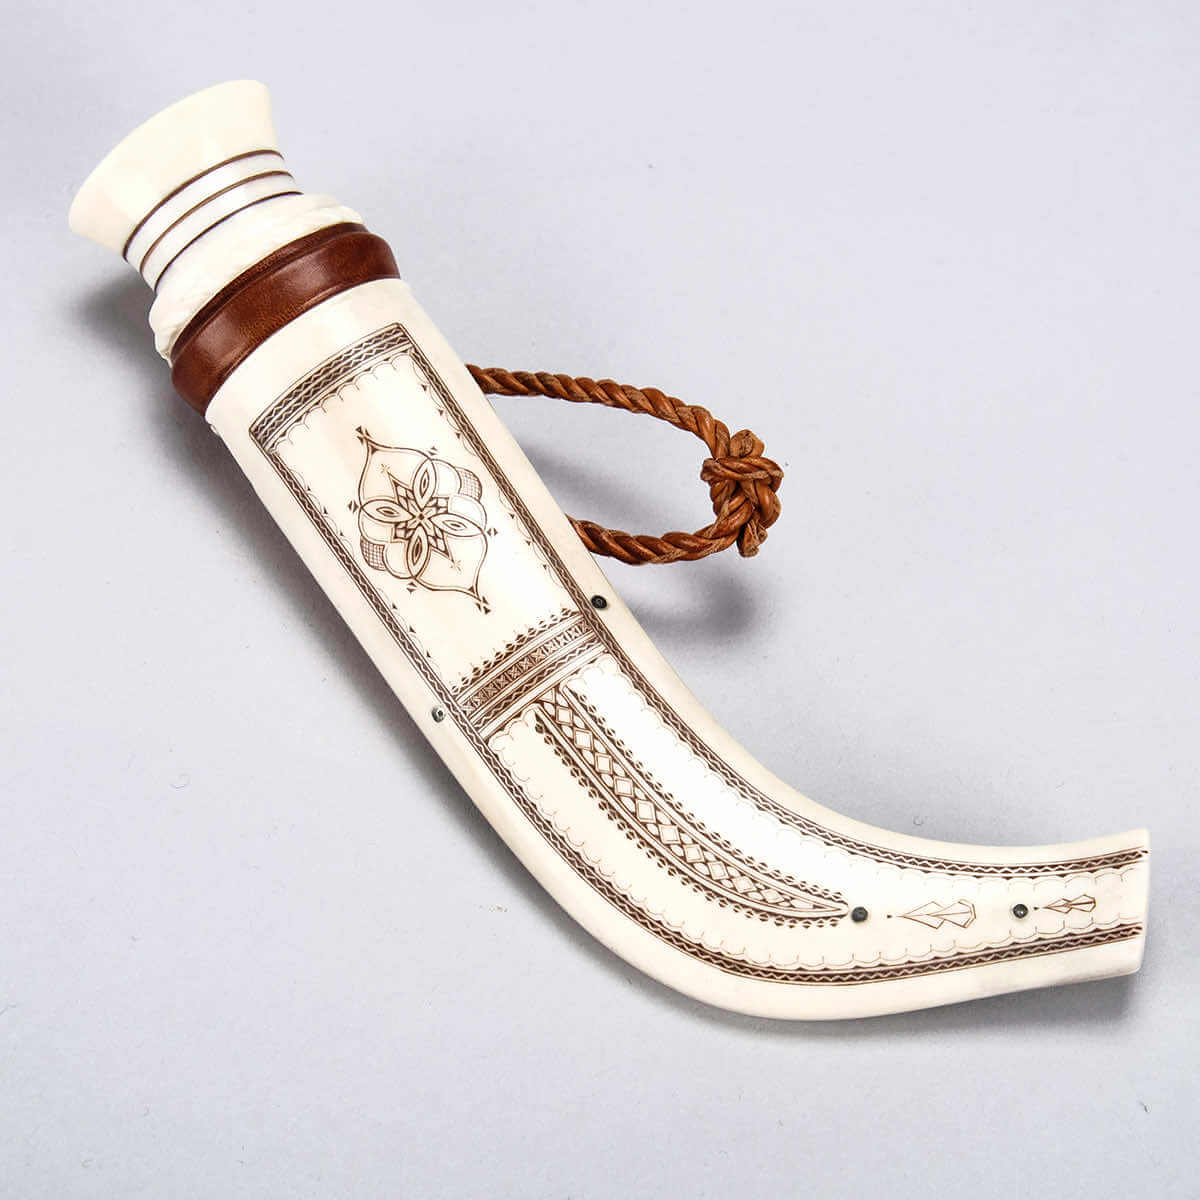
North Sami (Finnmark, Troms, northern Finland and Sweden). Stars, flowers, hearts, curved lines, shadows. Strings in twisted rope, or small geometric tips. The apple of the handle is more marked. The handle it is often smooth; the engraving reads above all on the sheath. The sheath usually has a more frank curve.
Sami Centre (Lule, intermediate zone). The braids of the south find themselves there, with shaded curves, but also simpler stars and crosses, which reach the north. Area of passage, not a closed style.
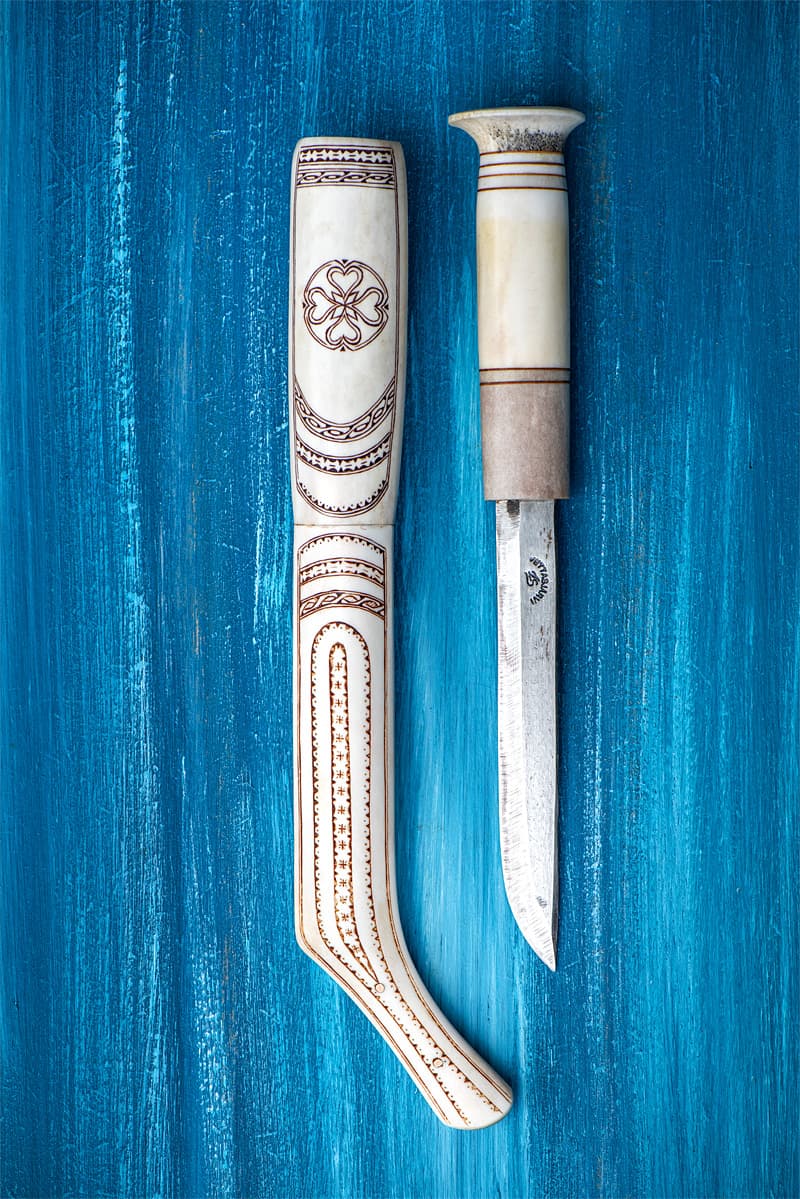
South Sami. The braid dominates, in lines or at peaks, usually over the entire surface of the handle or sheath. Strict borders, single or double rows of small crosses. The apple is less pronounced, the curve of the sheath softer. Wear variants transmitted to families; Some are sufficient to recognize a workshop.

Everywhere, the basic vocabulary remains the same: braid, zigzag, diamond, star, heart, border, sometimes reindeer or reindeer head. What changes is the combination and the place of the decor. The black pigment in the furrow (sweet, bark) is common to all three areas.
Not to be written as a fixed map: families move variants, and the duojár today experiment in their region, not by sticking north and south on the same reindeer wood.
→ Sami, Puukkos & Large Spaces


Hard duodji tools

  • Hard duodji: wood, reindeer wood, bone, metal.
  • Soft duodji: leather, fur, fabric, wool.
  • Cut and engraving: engraving knife (often forged by the craftsman, saw blade or steel recovered, sometimes a single bevel); punch for points, triangle primers and rivet holes; tip of puukko daily.
  • Layout: rapes and limes (plates, semi-rounds, needles); fine metal or bone saw; bow drill or modern for silk and rivets.
  • Finish: natural stones, green and red compounds, leather sharpening, abrasive until grain 2000, rags and wool.
  • Leather: Alenas, needles, leather knife, marking and embossing tools.
  • Traditional tools were simple and generally homemade; A good sharp knife served almost everything. Many duojár today combine tradition and modern tools (Dremel, strawberries) with regional motifs.

→ Craft excellence Sami


Advice

Always razor tool: A blunt iron rips out. Never force. Fix the room well, especially the sliders. Start with lines and triangles on falls before compositions. It is this mixture of precision and Sami patterns that is found on the handles and pots of masters as Pasi Jaakonaho.

Rating

What we don't do: Dremel alive on a finished piece, deep trait in theos, food pigment not fixed on a handle Hand contact.

Masters and references

A few landmarks, not a closed list. The duojár often sign little on the web.

  • Pasi JaakonahoInari. Finnish coutelier trained at the Sami institute, engravings and chip carving on poronsarvi. Not a duojár: a master of puukko who works this tradition. Article on Pasi Jaakonaho · Lamnia
  • Risfjells Sameslöjd, Vilhelmina. Knives all made of reindeer wood, south-sami engraving (streezes). Sameslojd. se
  • Aslak Rist, Finnmark. Sheath in reindeer wood with a North-Sami motif, quoted by the Store norske leksikon. snl.no/duodji
  • Nils Nilsson Skum (1872–1951), Kautokeino then Gällivare. Drafter and duojár; Wraps engraved, sometimes in the reindeer. Nordiska museet
  • Ingvar Svonni (born 1943), Sweden. Reindeer wooden knives signed, sold in the room. Bukowskis
  • Petter Eriksson Svonni (1903–1985), Svappavaara. Original knife on horn and wood, at the kitchen table. Family reference more than just an online showcase.
  • For the living gestureThe Sami Institute of Inari (Sámi oahpahusguovddáš) still forms garraduodji. The Sámi Duodji brand distinguishes the certified Sami craftsmanship from the knife « lapon style ».
  • Arctic Museum of Rovaniemi (Finland): direct link
  • Nordiska Museet (Stockholm): direct link

Here are authentic examples of traditional Sami engravings (duodji) on puukko.

Burning technique

The « kolrosing » like the Sami: a magnificent engraving technique.

Conclusion:

The engraving does not decorate the puukko After that, she's part of it. On reindeer wood as on the bone, the line remains thin, sharpened tool, light hand. The pigment only serves to make the furrow read; oil or wax protects the material without locking it in. It is this restraint that is recognized on a handle or sheath Sami, and that artisans like Pasi Jaakonaho still carry in the Duodji.

Thanks for the visit... And, most importantly, Subscribe to the newsletter not to miss the next articles. You can also comment and share this article on your favorite social network.

To go further:
• The puukko Over the seasons – Full guide + seasonal checklist + PDF to download
• I am cultelluphilist but I treat myself
• Quiz on the puukko

Warm regards,

Subscribe to the newsletter.


The puukko A to Z

ALL GUIDES

A complete journey:
choose sound puukko, do it its own, sharpen,maintain, handle it, and secure it with the children.

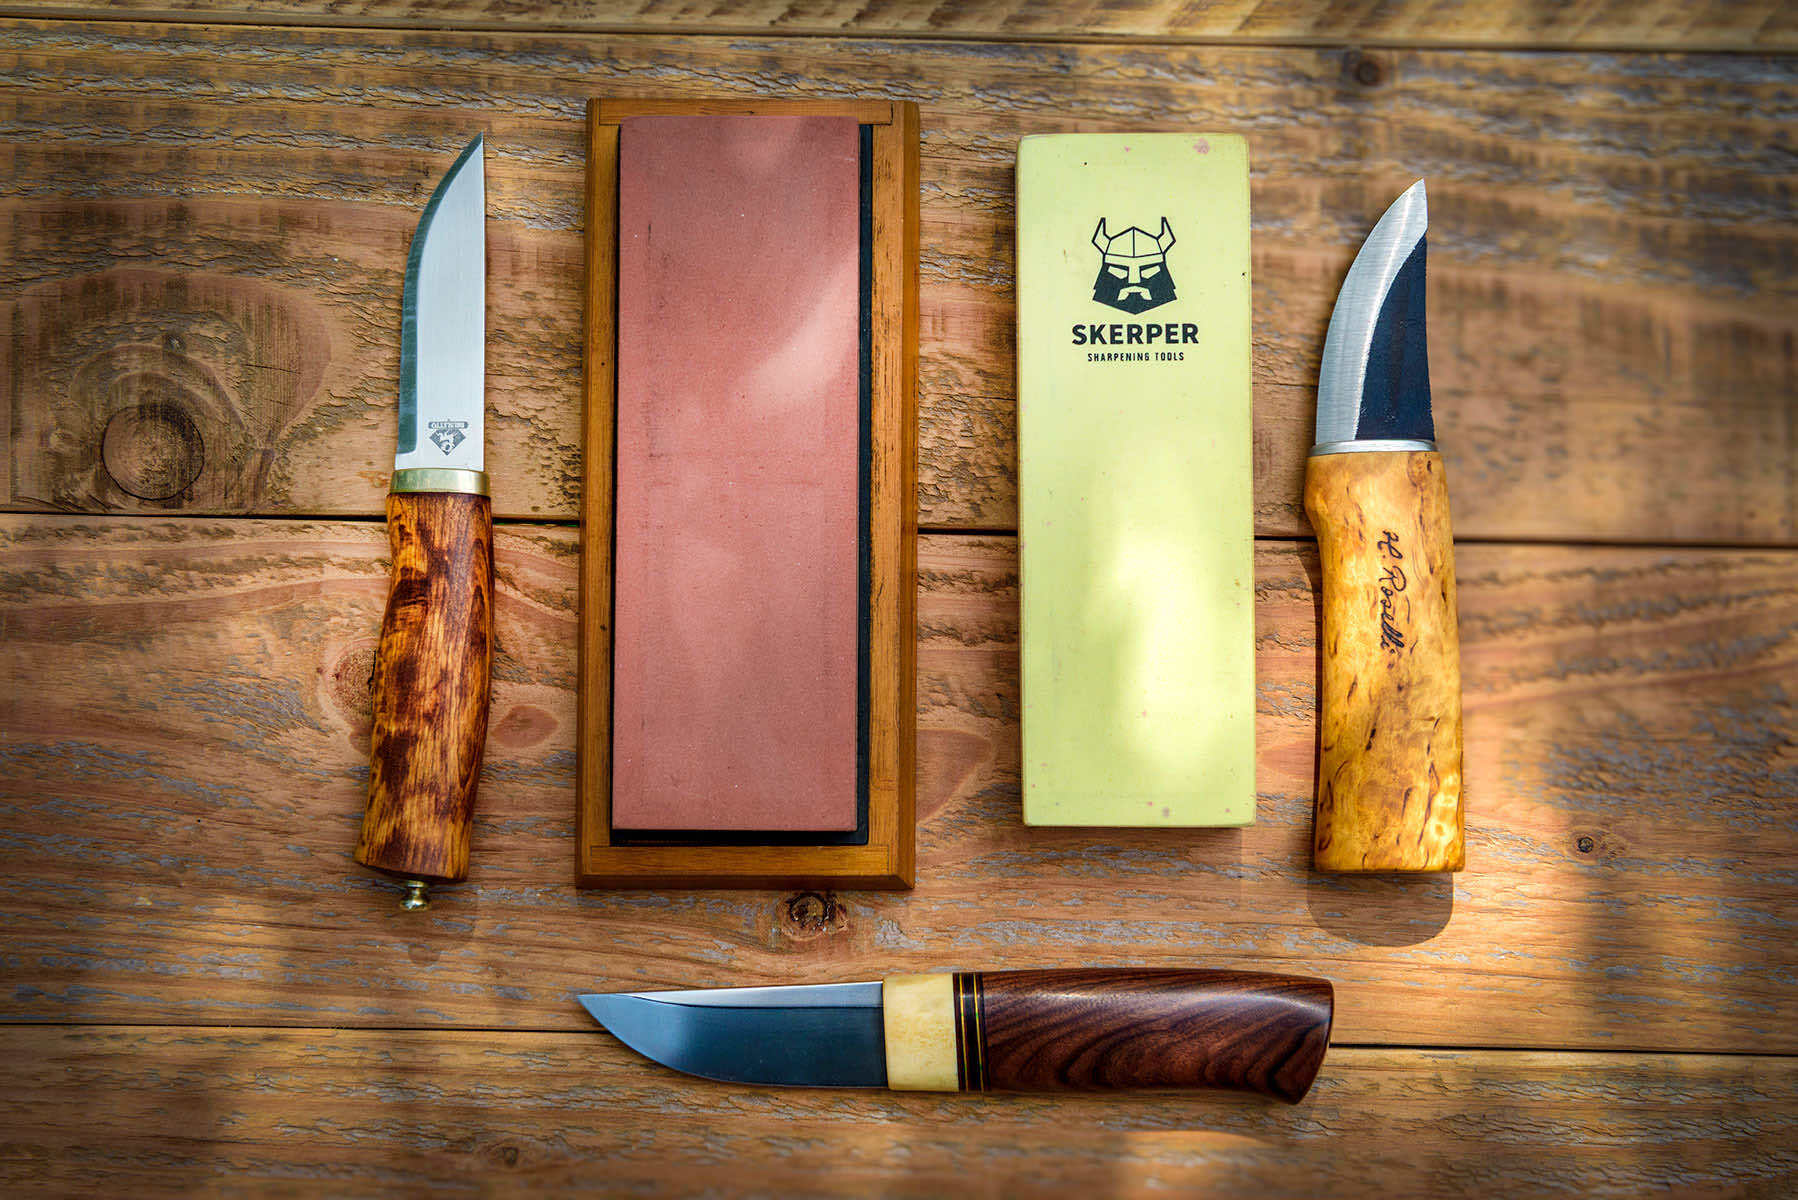
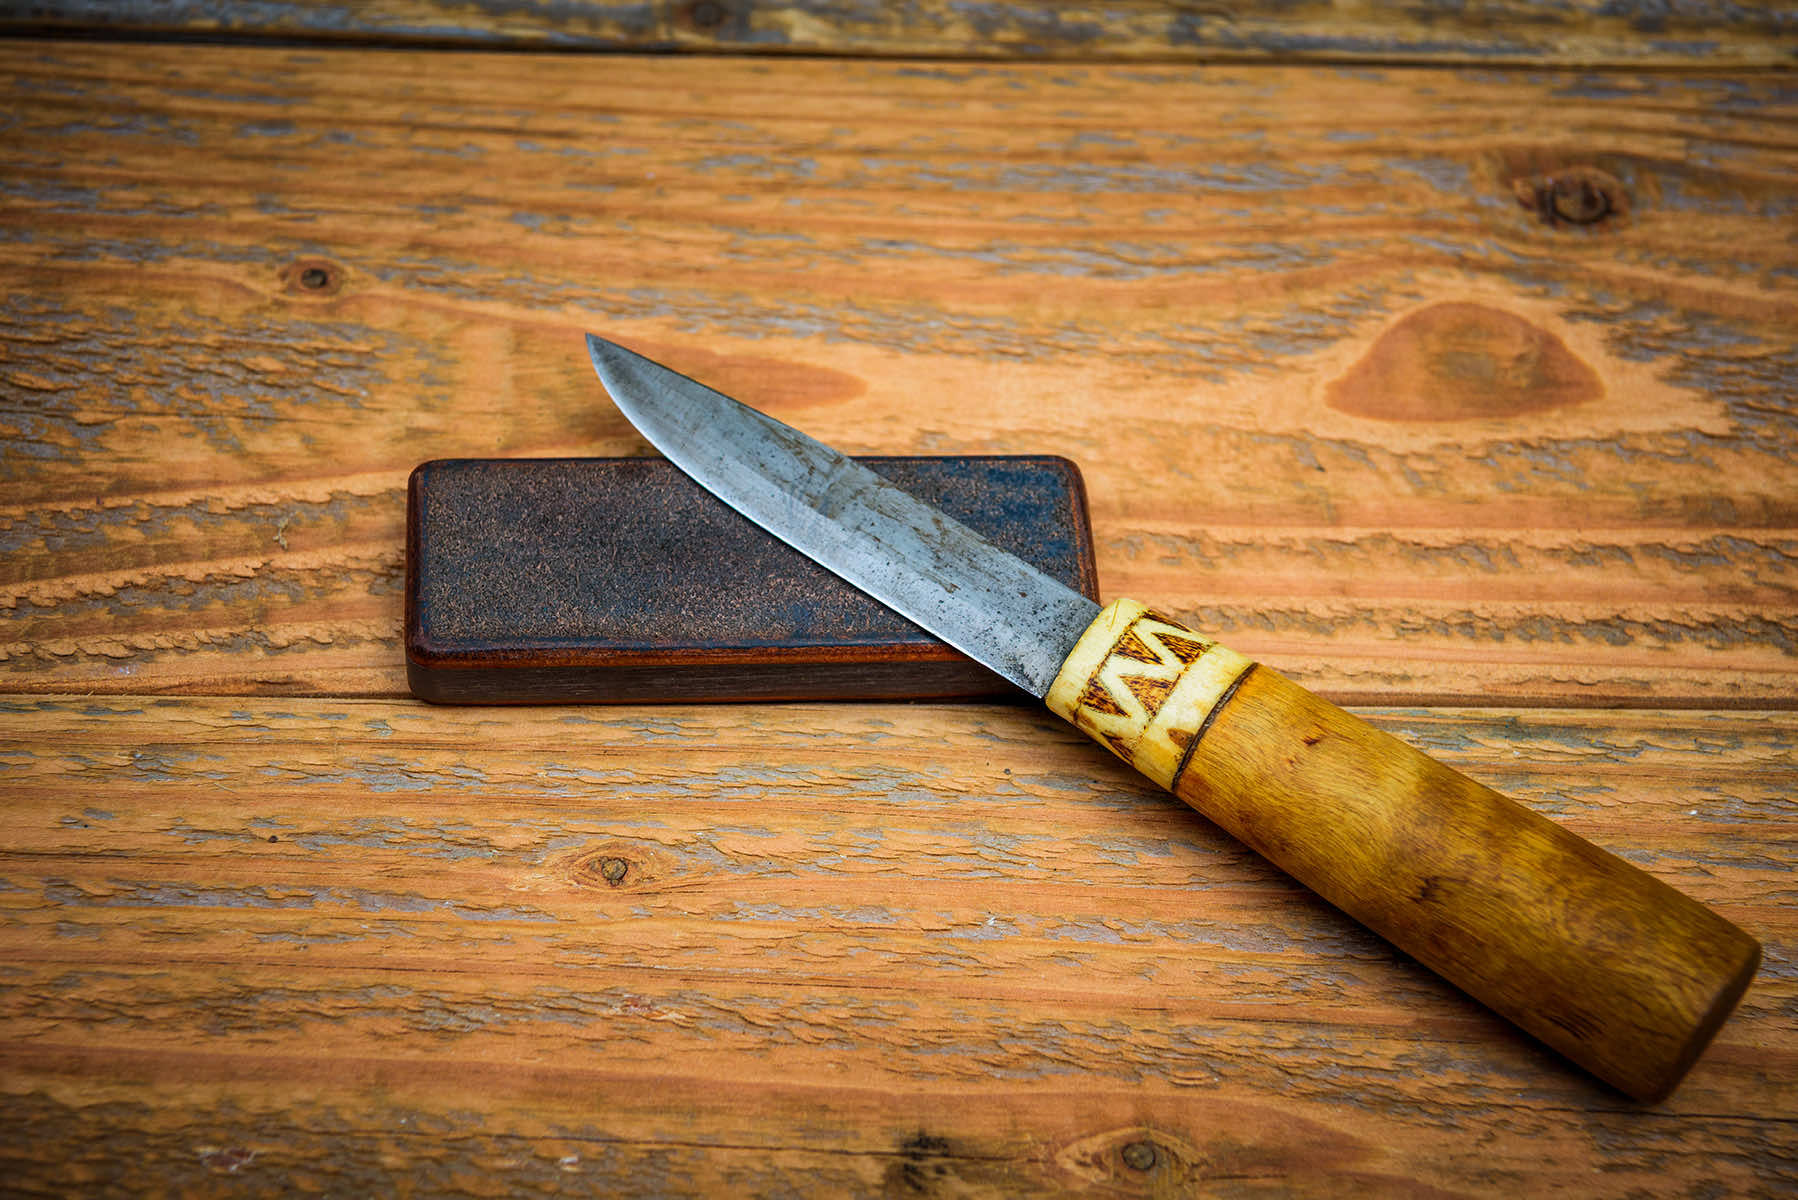
Stone sharpening techniques for puukkos

Stone sharpening techniques for puukkos 1798 1200 Puukko - Finnish knives

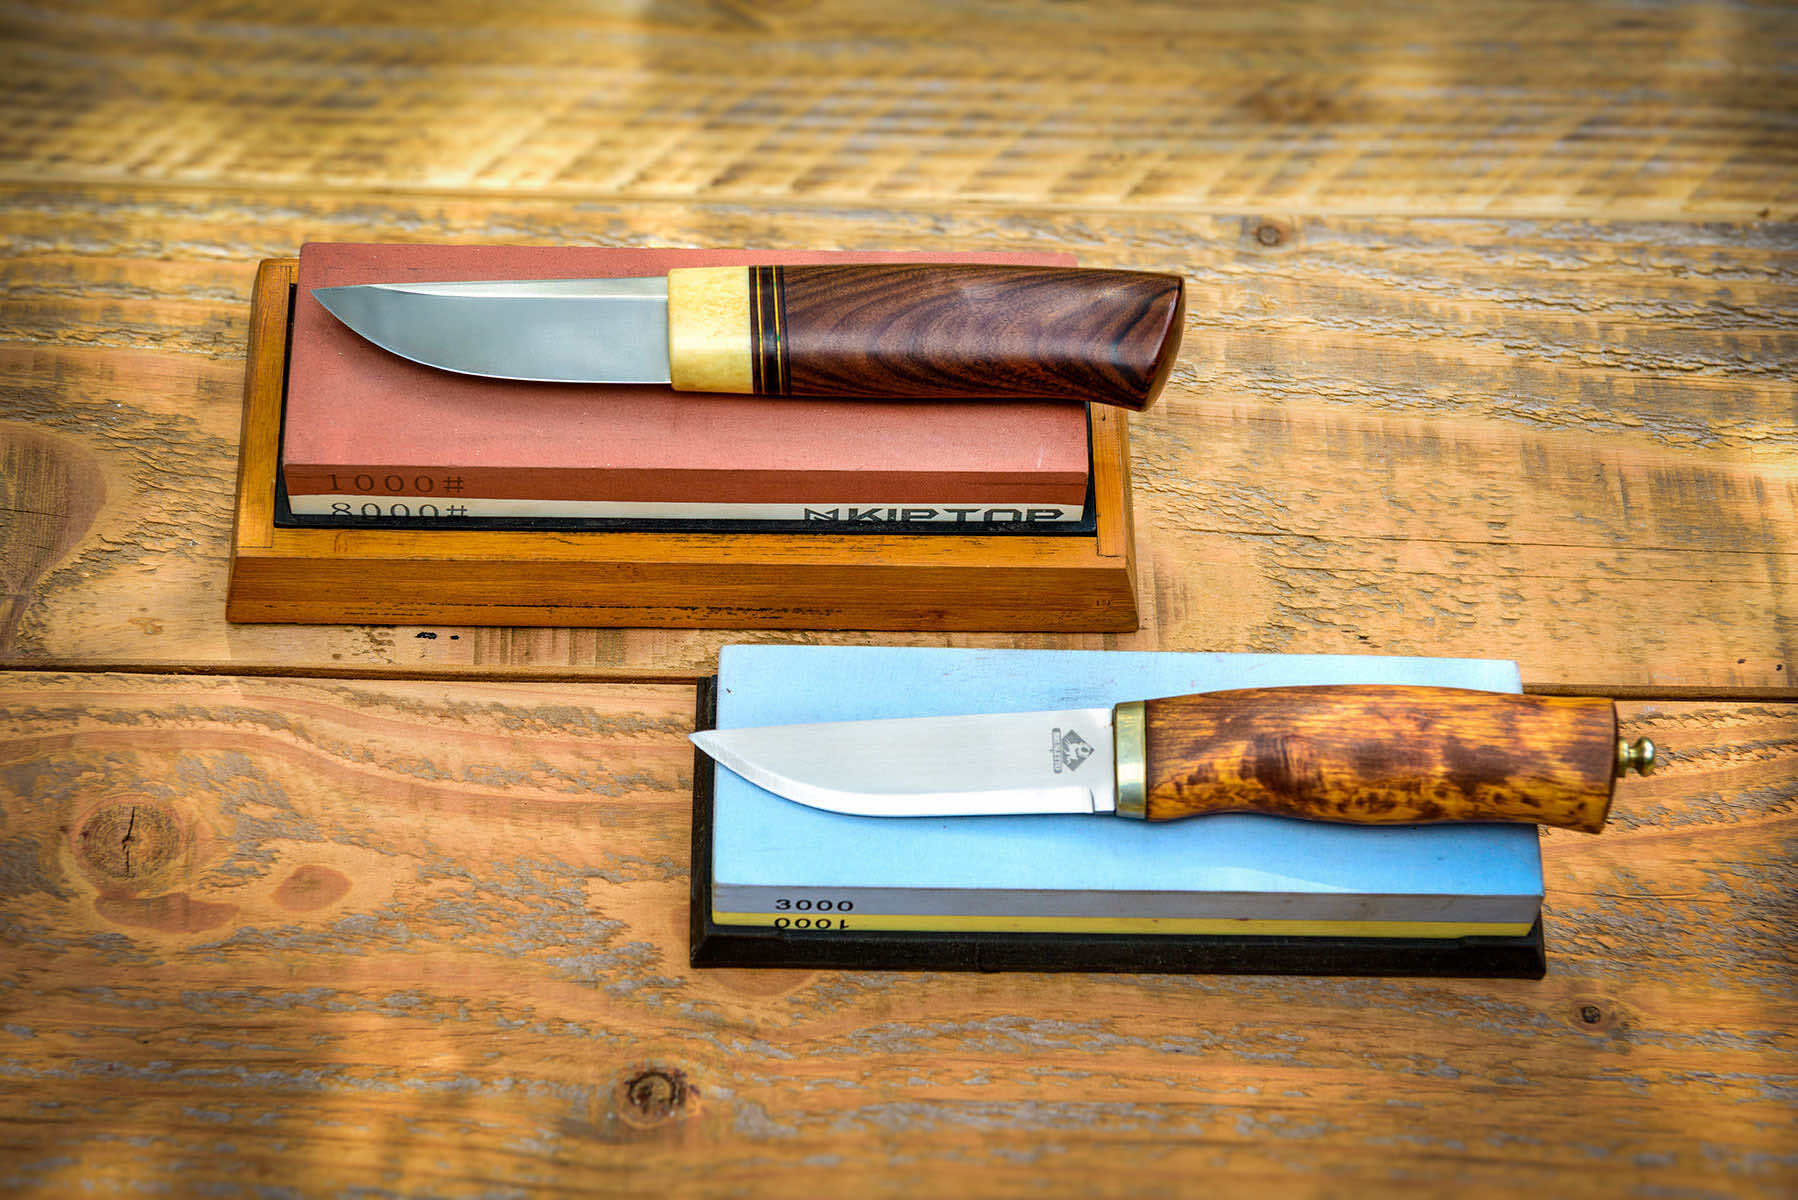
In this guide on stone, we will see together how to sharpen your puukko : choose good particle size, prepare the stone, find the right angle and install a simple maintenance routine, without professional equipment.

I spent hundreds of hours sculpting wood with many Scandinavian knives, making spoons, cups, bowls and much more. Puukkos occupy a special place in the hearts of outdoor enthusiasts and knives. This guide will provide you with the necessary knowledge to maintain a perfect edge on your puukkos.

INTRODUCTION

Recommended equipment (simple and effective)

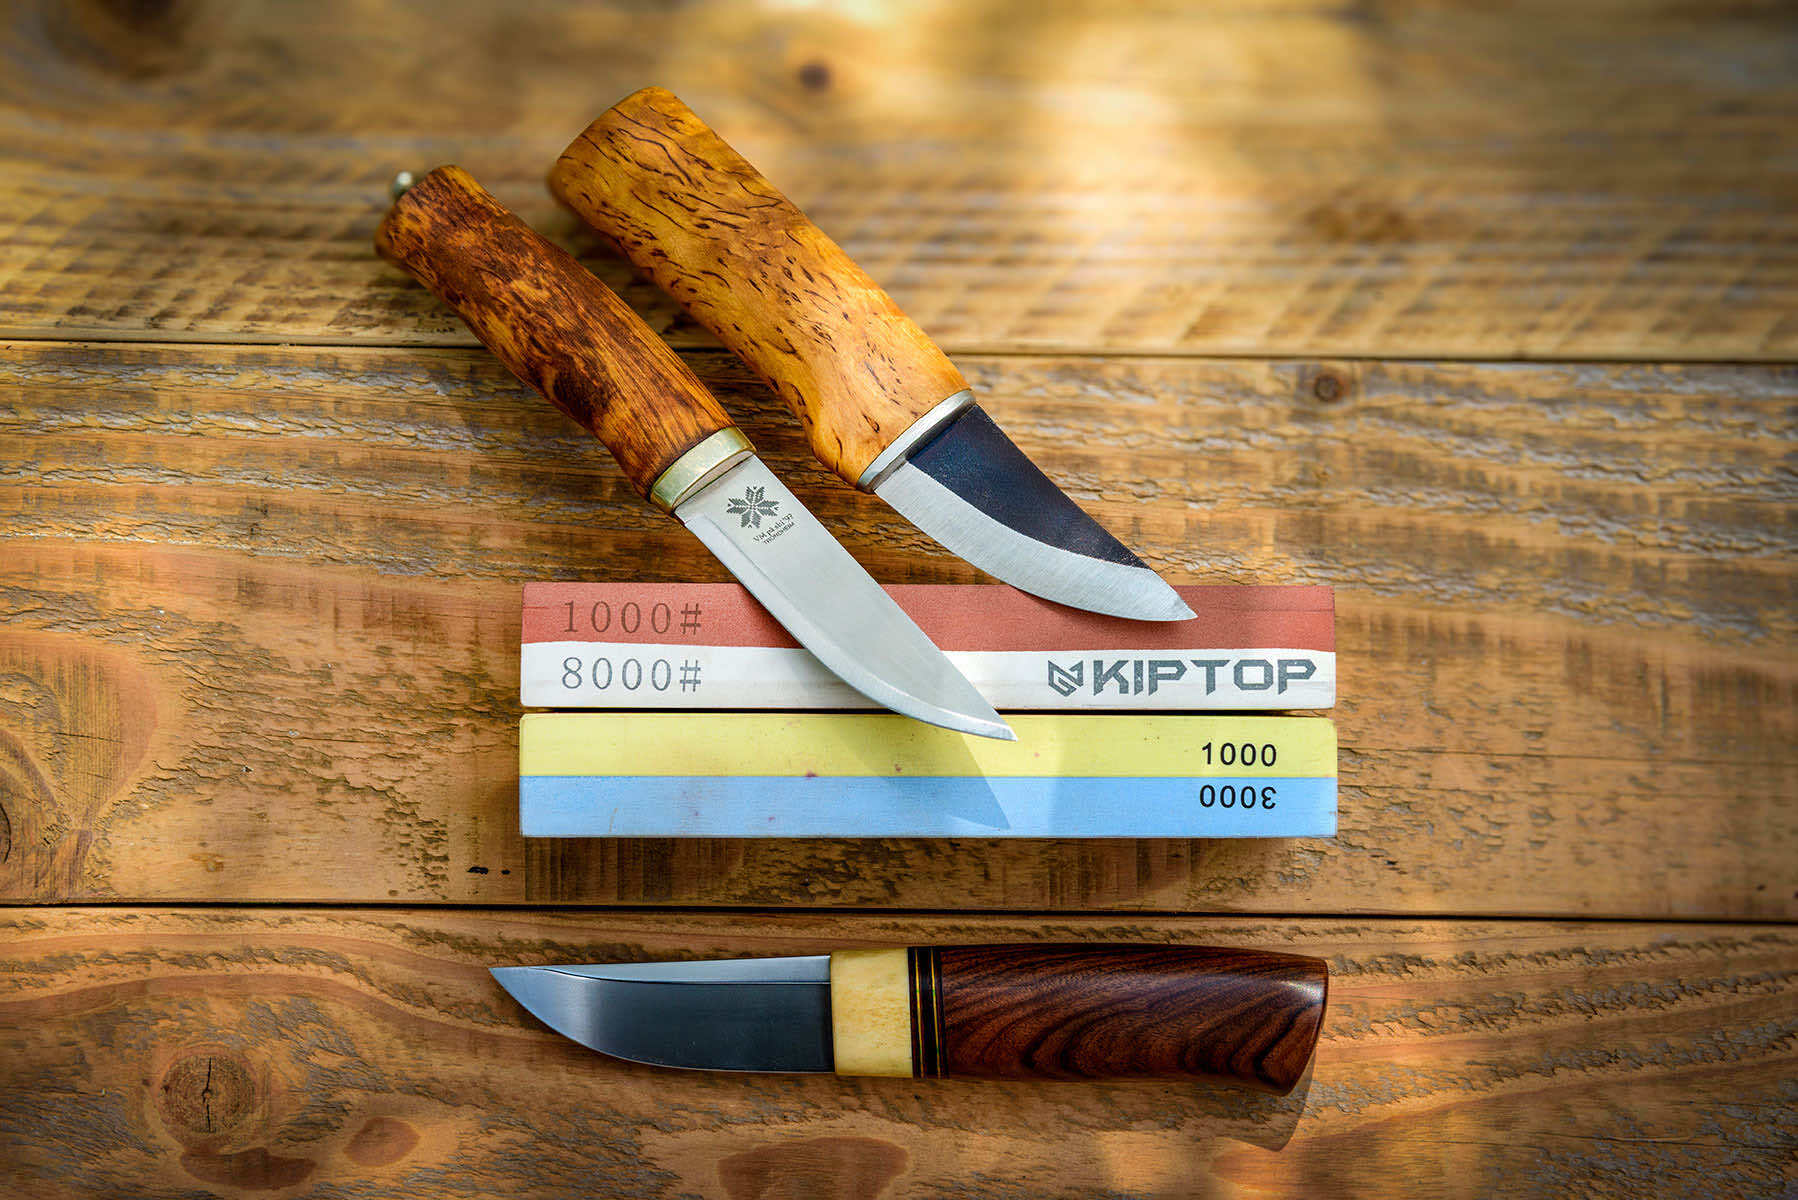
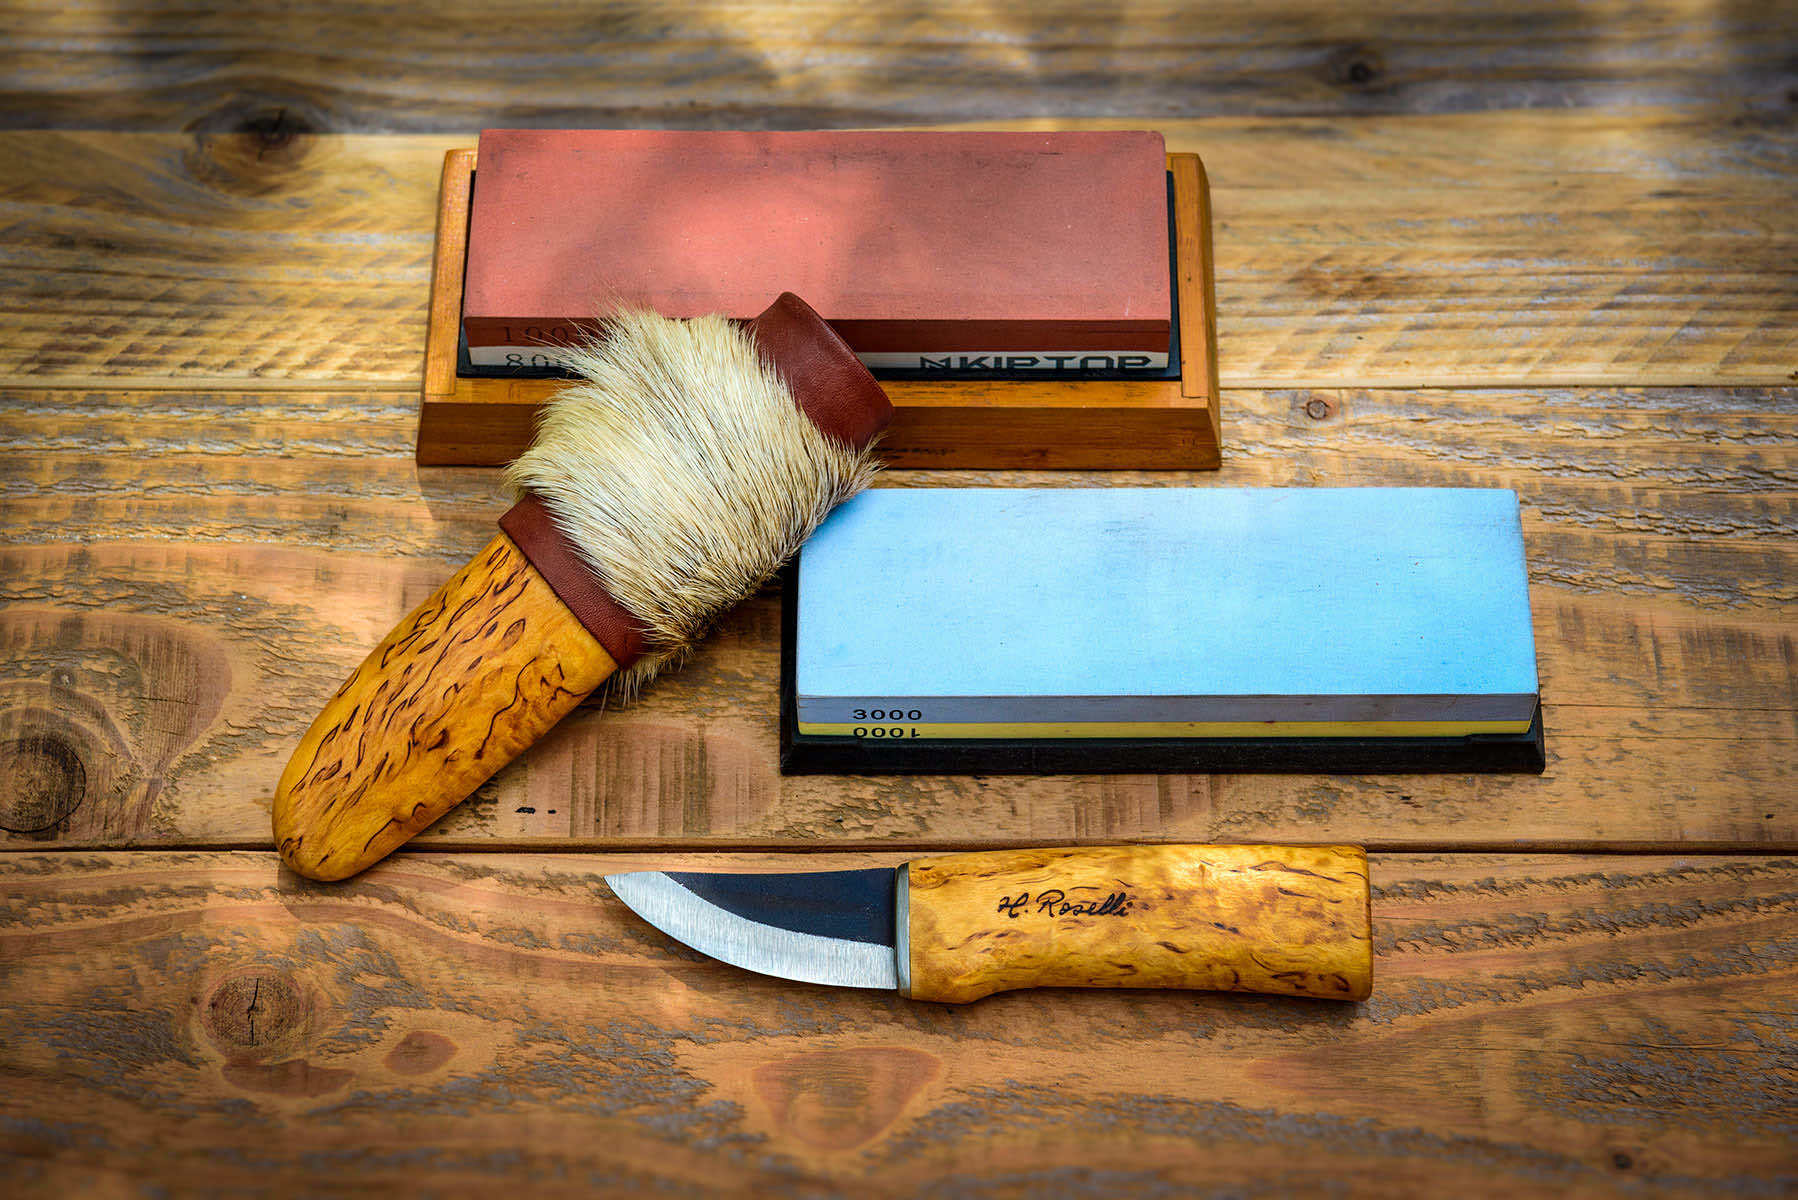
  • A flat stone (Japanese water stone preferably):Grain 400-600 (if the blade is really blunt or damaged)
  • Grain 1000 (sharpening current)
  • Grain 3000 to 6000 (finition)
  • Leather to sharpen (strop) + abrasive paste (green or diamond) for finishing
  • Water (for water stones)
  • Option beginner ultra-economic: flat board + wet glass paper (grains 400 → 1000 → 2000)

Avoid rifles to sharpen standard and fixed angle systems for V-shafts: they are not suitable for scandi.

Steel comparison carbon vs stainless steel

Steel carbon
Sharpening easy and fast, very aggressive sharp (ideal sculpture/wood). Rust easily → dry and oil. Patina Over time.
Oxidable
Resistant to corrosion and moisture. Sharpening A little longer. Often squeaking a little less « biting » on the wood.
For a puukko (scandi) : carbon If you're talking about the blade, stainless steel If you want zero constraint.
Damas steel
Different steel layers forged together. Especially aesthetic (corrugated grounds). Performance depends on the steels used, not the pattern.
Maybe carbon (rust, sharpening easy) or stainless steel. More expensive. On one puukko : beautiful, but not necessarily sharper than a good carbon Simple.

INSTRUCTIONS ON PIERRE NOT TOO

Traditional puukkos have a grind flat that descends directly to the wire, without secondary bevel. This is precisely what makes them very easy to sharpen once we understand the gesture: the wide bevel serves as a natural guide.

What is a scandi grind?

One scandi grind has a single flat bevel extending just below the center point of the blade to the sharp edge. This unique design eliminates the need for a secondary bevel, which makes it grind Scandi exceptionally sharp and easy to maintain. This design makes the knife ideal for woodworking, and outdoor activities, where precision and reliability are paramount.

1. Prepare the stone

  • Soak your water stone 5-10 minutes (unless it is a diamond or oil stone).
  • Place it on a stable and non-slip surface.
  • Find the angle (this is the most important), about 12°.
    The angle of sharpening optimal for knives grind Scandinavian is a subject of many discussions among enthusiasts. In general, most puukkos work better when sharpened at an angle of 12 degrees per side for blades up to 2.5 mm thick and 14 degrees thicker blades.
  • Apply moderate pressure with the fingers directly on the bevel (especially on the 40-50 % front of the bevel).
  • Performs back and forth movements (round and forth) over the length of the blade.
  • At the tip (curved part), the handle to keep the bevel in full contact.
  • Alternates sides regularly. (same number of passes)
  • Continue until you form a net morfil on all the thread.
  • Some prefer small circular movements rather than linear back and forth.
    It helps to better distribute the wear of the stone and avoid scratches that are too marked in one direction.
    Same principle: bevel well flat + bevel pressure.

Tip beginner : Colour the bevel with black felt. When the felt disappears evenly, you're flat.

2. Switch to finer grains

  • Repeat the same gesture on finer grains.
  • Recommended order of progress:
  • Average grain (800-1000) → yarn formation
  • Fine grain (3000-6000) → refinement
  • Eliminate the morfil. Some very light passes alternating sides.

3. Leather finish (strop)

  • Pull the blade back forward (never the edge first) 20-30 times on each side.
  • The result must be razor.

Full article: Techniques sharpening leather for puukkos

4. Common mistakes to avoid

  • Raise the back of the blade too (involuntary creation of a micro-bevel too large)
  • Work only the middle of the blade and neglect the tip
  • Too high pressure on fine grains
  • Forget to dry and oil immediately (especially on steel) carbon)

5. Daily maintenance

A simple passage on the leather after use is often enough to maintain an excellent edge for a long time.

Full article: How to maintain your puukkos

PRACTICAL GUIDE TO CHOOSE I've got a little water.

1. Understand grains (granulometry)

  • The lower the number, the more abrasive the stone (it removes matter quickly).
  • The higher the figure, the finer it is (it polishes and refines the edge).
GrainMain useWhen to useMethod of use
200/600Repair / trimmingVery blunt, chipped or damaged bladeFirm pressure, long and regular movements. A lot of water (or oil). Remove the metal quickly to reform the edge.
800/1000Sharpening MainRoutine maintenance (most important)Moderate pressure. Alternate sides regularly. This is the stage where the real sharpness is formed. Well lubricate.
3000/6000Finishing / polishingShavering and beautiful renderingLight pressure. Short and controlled crossings. Look for a shiny and smooth edge. Gradually reduce pressure.
8000 +Polishing mirrorOptional, for perfectionistsVery light pressure (almost the weight of the blade). Soft movements. Often followed by leather (strop) with abrasive paste.

You almost never need to go below 1000 if you regularly interview your blade.

2. The best choice to start

Double-sided combined stone 1000/3000 (or 1000/6000).
This is the ideal compromise:

  • Face 1000 → you recreate the thread
  • Face 3000/6000 → you end up razoring

A single stone is largely enough to start and covers 90% of the needs of an owner of puukko.

3. Large families of water stones

  1. Dipping stones (soaking): King, some Naniwa/Suehiro.
    You plunge them 5-15 min into the water before use. They produce pleasant abrasive mud and are very tolerant to the beginners.
  2. Splash-and-go (wet just on the surface): Shapton Glass, some Naniwa Pro/Chosera. Ready in 10 seconds, harder, wear less quickly, very regular.

4. Recommended (reliable and accessible)

  • King: (best value for money to start with)
    Japanese classic, very indulgent, excellent feedback. The King 1000/6000 has been a standard for years.
  • Naniwa: (Chosera Professional)
    Excellent sensation, fast and regular cutting. An upper step in comfort and performance.
  • Shapton: (Glass or Pro)
    Very hard, splash-and-go, keep their flatness for a long time. Ideal if you want something precise and lasting.
  • Suehiro Cerax: very good value for money, nice to use.

Avoids cheap, low-quality, no-name stones (they wear too fast and give an irregular result).

5. Other important criteria

  • Size: minimum 18-20 cm long × 5-6 cm wide (practical for one puukko).
  • Planet: A stone that digs too fast is frustrating. Provide a flattening plate (Atoma 140 or equivalent) fairly quickly.
  • Anti-slip holder: essential (rubber base or dedicated support)
  • Budget beginner : 30-60 € for a good combined King or equivalent. Over 80-100 €, you get into the really good (Naniwa Pro, Shapton).

6. Concrete recommendation according to your profile

  • Beginner pure / tight budget → King 1000/6000 (or 1000/3000)
  • Good value for money and comfort → Naniwa or Suehiro 1000 + 3000
  • Practical and sustainable (splash-and-go) → Shapton Glass 1000 + 4000/5000
  • You sharpen often and you want the top → Naniwa Professional

In summary for a puukko : starts with a combined stone 1000/300 or 1000/6000 brand King or Naniwa. It's simple, efficient, and perfectly suited to your needs.grind Scandinavian. You can always complete later with a larger grain (400) if you damage a blade, or a thinner grain for polishing.

TECHNICAL D SHARPENING ON THE TERRAIN WITH A POCHER.

With a little practice, a knife Scandi (Mora, Casström, etc.) becomes razor again in a few minutes, even in nature. This is one of the reasons why this geometry is so appreciated by Scandinavian and European bushcrafters.

Preparation
Check the edge. If the blade is just a little blunted, start directly at the fine grain. If it is very blunt or chipped, start with the more aggressive grain.

Bevel positioning (key point)
Place the wide Scandinavian bevel entirely flat on the diamond plate. You must feel that the entire bevel surface is in contact. It's the « natural guide » of l grind Scandi : does not lift the back of the blade.

Movements
Performs forward-to-rear passages (or rotary movement) by keeping the bevel perfectly flat.
Moderate pressure (diamond cuts well, unnecessary force).
Work in zones: starts with the right part (talon → belly), then the belly, and finally the tip.
At the tip (curve), slightly increases the handle to keep contact on the entire bevel.

Alternance and formation of the morfil
Make 10 to 20 passes on one side, then on the other. Continues until you feel a fine biting over the length of the edge. Then alters to eliminate it gradually.

Finish (optional but recommended)
Pass on a small leather with or without dough. 10-20 passes on each side to eliminate the last imperfections and get a razor edge.

Field specific tips
Work on a stable surface (knit, stump, backpack...).
Cleans the diamond plate (water + cloth) regularly to keep it effective.
For quick maintenance between two intensive uses: few fine grain passes are enough.

Benefits of this method
Extremely simple: no need to guess the angle.
Quick (5-15 minutes depending on the state of the blade).
Very effective for woodworking, bushcraft and outdoor tasks.

FAQ

Frequently asked questions are clear and practical for sharpening knives on stone sharpen.
  • In concrete terms, the two terms often refer to the same action: removing material to reform the edge.

    • L sharpening (or sharpening on stone) removes steel to recreate the wire.
    • Affiliation (fusil or strop) simply re-aligns a wire already present without removing a lot of material.
    • Yes, for most classic water stones (King, Naniwa traditional...) 5 to 15 minutes until the air bubbles stop rising.
    • Stones « splash-and-go » (Shapton, some Naniwa Professional) are content with a simple surface watering.
    • Never oil on a water stone (it would be irreparably damaged).
    • Grossier (220-800): repair of sharpness or very blunt blade.
    • Medium (1000-2000): current sharpening (most important).
    • End (3000-6000): polishing and refining.
    • Very fine (8000+): mirror finish (optional).

    To begin: A combined 1000/3000 stone is enough.

    • Puukko Scandi Grind: about 12° per face
    • Japanese knives (double bevel): about 15° per face.
    • Western knives: 15-20° per face.
    • More robust blades (outdoor, chopper): 20-25°.
  • The same angle as sharpening (often 15-20° for knives, flatter for straight shavers where the back remains in contact). Some lower the angle by 1-2° to avoid rounding the wire.

  • Gently pass the finger perpendicular to the edge (never in the direction of length). You must feel a fine metallic blush on the other side of the worked face. Once the morfil is formed over the entire length, go over the other side to eliminate it.

    • Normal domestic use: every 1 to 3 months (or as soon as the cut becomes less fluid).
    • Intensive (professional) use: Every 1 to 4 weeks.
    • Between sharpening, use a rifle (in moderation) or a strop for maintenance.
    • He slices a piece of paper suspended effortlessly.
    • It cuts the skin of a mature tomato without slipping.
    • He shaves a hair or cuts newsprint in « V » clean.
  • Yes for smooth steel blades.
    Avoids or adapts to:

    • serrated blades (special).
    • Ceramic blades (diamond stone only).
    • Very cheap knives Very soft steel (they wear fast).
    • Angle irregular.
    • Pressure's too high.
    • Pierre insufficiently wet.
    • Forget to form and eliminate the morfil.
    • Move too quickly from coarse grain to very fine grain without intermediate steps.
    • Do not clean the blade and stone after use.
  • Rinse it thoroughly with clear water, wipe it and let it dry completely in the open air (never in the direct sun or near a source of heat). Put it flat, away from dust.

    • Angle irregular.
    • Pressure's too high.
    • Pierre insufficiently wet.
    • Forget to form and eliminate the morfil.
    • Move too quickly from coarse grain to very fine grain without intermediate steps.
    • Do not clean the blade and stone after use.

Conclusion:

Scandi grind is designed to be simple. Once the bevel is flat on the stone (or pocket diamond), the angle is on its own. Starts with a combined stone of 1000/3000 or 1000/6000, forms the morfil, refines, and then passes to leather. Regular maintenance is sufficient: the puukko razors again in a few minutes, both at home and in the field.

We don't get a razor edge at first. Sharpen is an art that requires long hours of practice. Sometimes, at the end of the day, the need for a bandage... I speak with knowledge. Always be very careful and focused on what you do. If you can't be in the moment, it's better to drop it and resume later.

Thank you very much for going through this article. If you don't want to miss the following, subscribe to the newsletter (it's just below). I usually answer the questions quickly enough, so if you have any, don't hesitate, you can comment on it.

To complete this article :

Warm regards,

Subscribe to the newsletter.


Norway – Sweden – Finland

WHO MAKES THE BEST PUUKKOS?

Techniques sharpening leather for puukkos

Techniques sharpening leather for puukkos 1798 1200 Puukko - Finnish knives

Stropping (sharpening leather) is a finishing technique that refines and polishes the edge of a blade on leather.

Technical principle: slide the blade in motion, at the angle of sharpening, with a very light pressure, alternating the sides. Main advantage: it quickly restores the wire, prolongs the interval between two complete sharpenings and gives a sharper and lasting edge.

A CLAIR AND PRACTICAL GUIDE ON TECHNOLOGIES D SHARPENING ON CUIR FOR PUUKKOS.

1. Why stroper?

Stropage refines and polishes the edge after the edge sharpening on stone. Here's what he does:

  • Line the wire (remove the micro-burr)
  • Quickly restores a sharp edge that began to move slightly.
  • Gives a more aggressive and durable edge
  • Improves slide of blade
  • Can restore sharpness quickly between two complete sharpenings

2. Equipment requirements

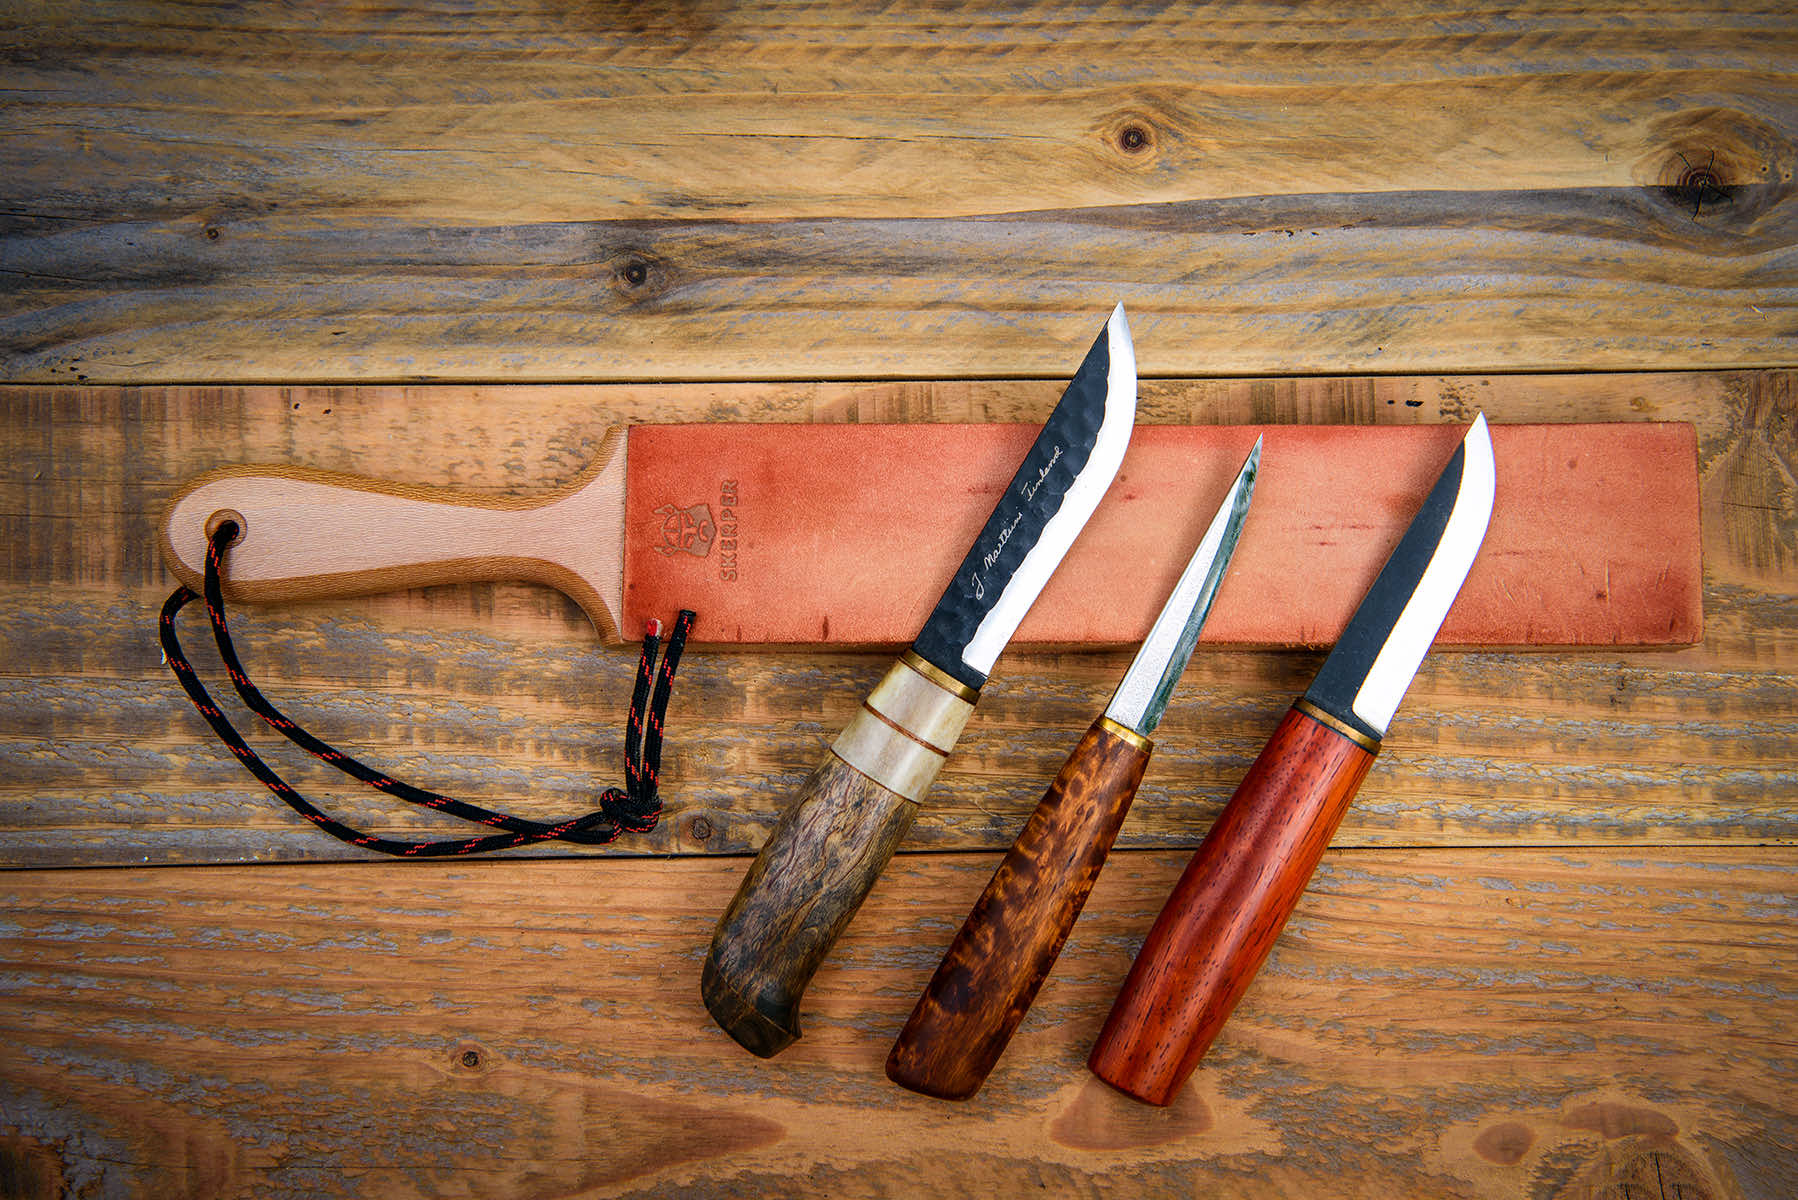
Leather: face flesh (sweet) or face flower (light). The flesh face hangs the compound better.

Support:

  1. Strop suspended (hanging strop)
  2. Strop flat (paddle strop) → easier for beginners

Abrasive compound (strongly recommended):

  • Green (chromium oxide) → the most versatile
  • White or black → finer or more aggressive
  • Uncomposed = very light polishing only

3. Basic technique (most important)

Golden Rule: Always push the back of the blade first (spine leading).
You never pull the edge forward (risk of biting leather).

Steps:

  • Apply a thin layer of compound to the leather (if used).
  • Put the blade flat on the leather, then lift slightly the back to get the same angle as ton sharpening (usually 15-20° per side for one Scandi or a classic sharp).
  • Push the blade forward, keeping the angle constant (the sharp « Next »).
  • At the end of the passage, lift the blade, turn it back, and come back in the other direction.
  • Alternate Regularly sides.
  • Pressure: Very light. The weight of the blade + a slight support is sufficient. Too much pressure rounds the edge.

Number of passages:

  • Current maintenance: 10 to 20 passages per side
  • After sharpening on stone: 30 to 50 passages per side
  • Mirror polishing: more + very fine compound

4. Useful variants

Type of stropAdvantageRecommended for
SuspendedVery fine sensation, good controlExperienced users
FlatMore stable, easierBeginners and regular use
Leather + green compoundBetter efficiency/fineness ratioMost cases
Leather (without compound)Ultra-soft polishingVery light finish

5. Frequent tips and errors

  • Always clean the blade after stropage (the compound can leave residues).
  • Do not use a too dirty or too heavy compound (it becomes less effective).
  • If you feel the blade « Hang on » strong → too much angle or too much pressure
  • For blades Scandi (very common on Mora, Helle, etc.): keep the angle flat Scandi.
  • A good stropage can make the difference between a sharp « correct » And a razor edge.
  • Stroke a clean, dry blade.
  • Never push the edge in the leather.
  • Stropage does not replace real sharpening if the blade is really blunt or damaged.
  • With practice, the gesture becomes fluid and almost instinctive (often compared to the movement of the old barber).

6. Summary and recommendations:

ElementsRecommendationsDetails / TipsRecommended frequency
DirectorateBlade back firstNever edge forward (risk of biting leather)Each stropage session
PressureVery lightWeight of blade + light support sufficientEach stropage session
AngleSame angle as I sharpening (15-20°)Keep angle constant throughout passageEach stropage session
Number of passages10 to 50 per side10-20 maintenance / 30-50 after stoneDepending on the state of the edge
Abrasive compoundGreen chrome oxide (recommended)Apply thin layer on the flesh faceReload leather every 5-10 sessions
Type of stropPaddle (beginner) or suspended (experienced)Face flesh hangs the compound betterPreference and level
Maintenance stropageLight polishingGive the bite back quicklyAfter 2 to 5 uses
Stropage after stoneComplete polishingRefines and aligns the yarn after sharpeningAfter each sharpening on stone

Nothing replaces practice, but a good video helps greatly to visualize the gesture. This is the one I find the clearest and most useful for a good use of leather.

HOW MAINTAIN CORRECTLY A STROP IN CUIR:

1. Regular cleaning

  • After each use (or every 3-4 sessions), remove the excess compound and metal particles.
  • Use a soft brush (tooth brush or suede brush) to brush in the leather direction.

For further cleaning:

  • Pass a slightly damp cloth (weak water only).
  • Let the air dry well before re-use.
  • Avoids water too much and especially aggressive chemicals.

2. Recharge in abrasive compound

The compound is gradually sausing.

When to recharge?

  • When the strop hangs less well
  • When results decrease
  • Generally every 5 to 10 sessions depending on the intensity of use.
  • Apply a thin layer of compound (preferably chromium oxide green).
  • Spreads well with the back of an old knife or with the fingers (with gloves if possible).
  • Too much compound makes the strop « fat » and less effective.

3. Leather maintenance

Leather can dry out over time. From time to time (every 2-3 months depending on usage):

  • Apply a very light layer of leather balm, beef foot oil, or leather conditioner (type Bick 4, Leather Honey, etc.).
  • Let in, then wipe the excess.
  • Be careful: don't put too much on, otherwise the leather becomes too fat and the compound hangs more correctly.

4. Storage

  • Store the strop in a dry place, sheltered from dust and direct sunlight.
  • For a strop suspended: leave it tight or put it flat.
  • For a paddle: store it in its cover or in a clean drawer.
  • Avoid damp places (bathroom, cellar...).

5. When to replace the strop?

  • Leather is very worn, hardened or cracked
  • It no longer holds the composition correctly
  • It has deep cuts or too smooth areas
  • In intensive use: average life of 2 to 5 years depending on the quality of the leather

Additional tips

  1. Keep a small clean cloth dedicated only to strop.
  2. Make on one side « compound » and the other « leather » If your strop is double-sided.
  3. A strop well maintained results much better than a strop neglected, even high-end.

6. Summary table

ActionHow to doRecommended frequencyTip
CleaningBrush with soft brush + damp clothAfter each session or every 3-4 usesAllow to dry before reuse
Recharge in compoundApply a thin layer of green chrome oxideEvery 5 to 10 sessionsToo much compound = less effective
Feeding leatherLight balm layer or leather conditionerEvery 2 to 3 monthsWipe the excess, do not overload
StorageDry place, sheltered from dust and sunAfter each useAvoid moisture
State controlCheck for wear, cracks and hold of compoundEvery monthReplace if leather is too worn

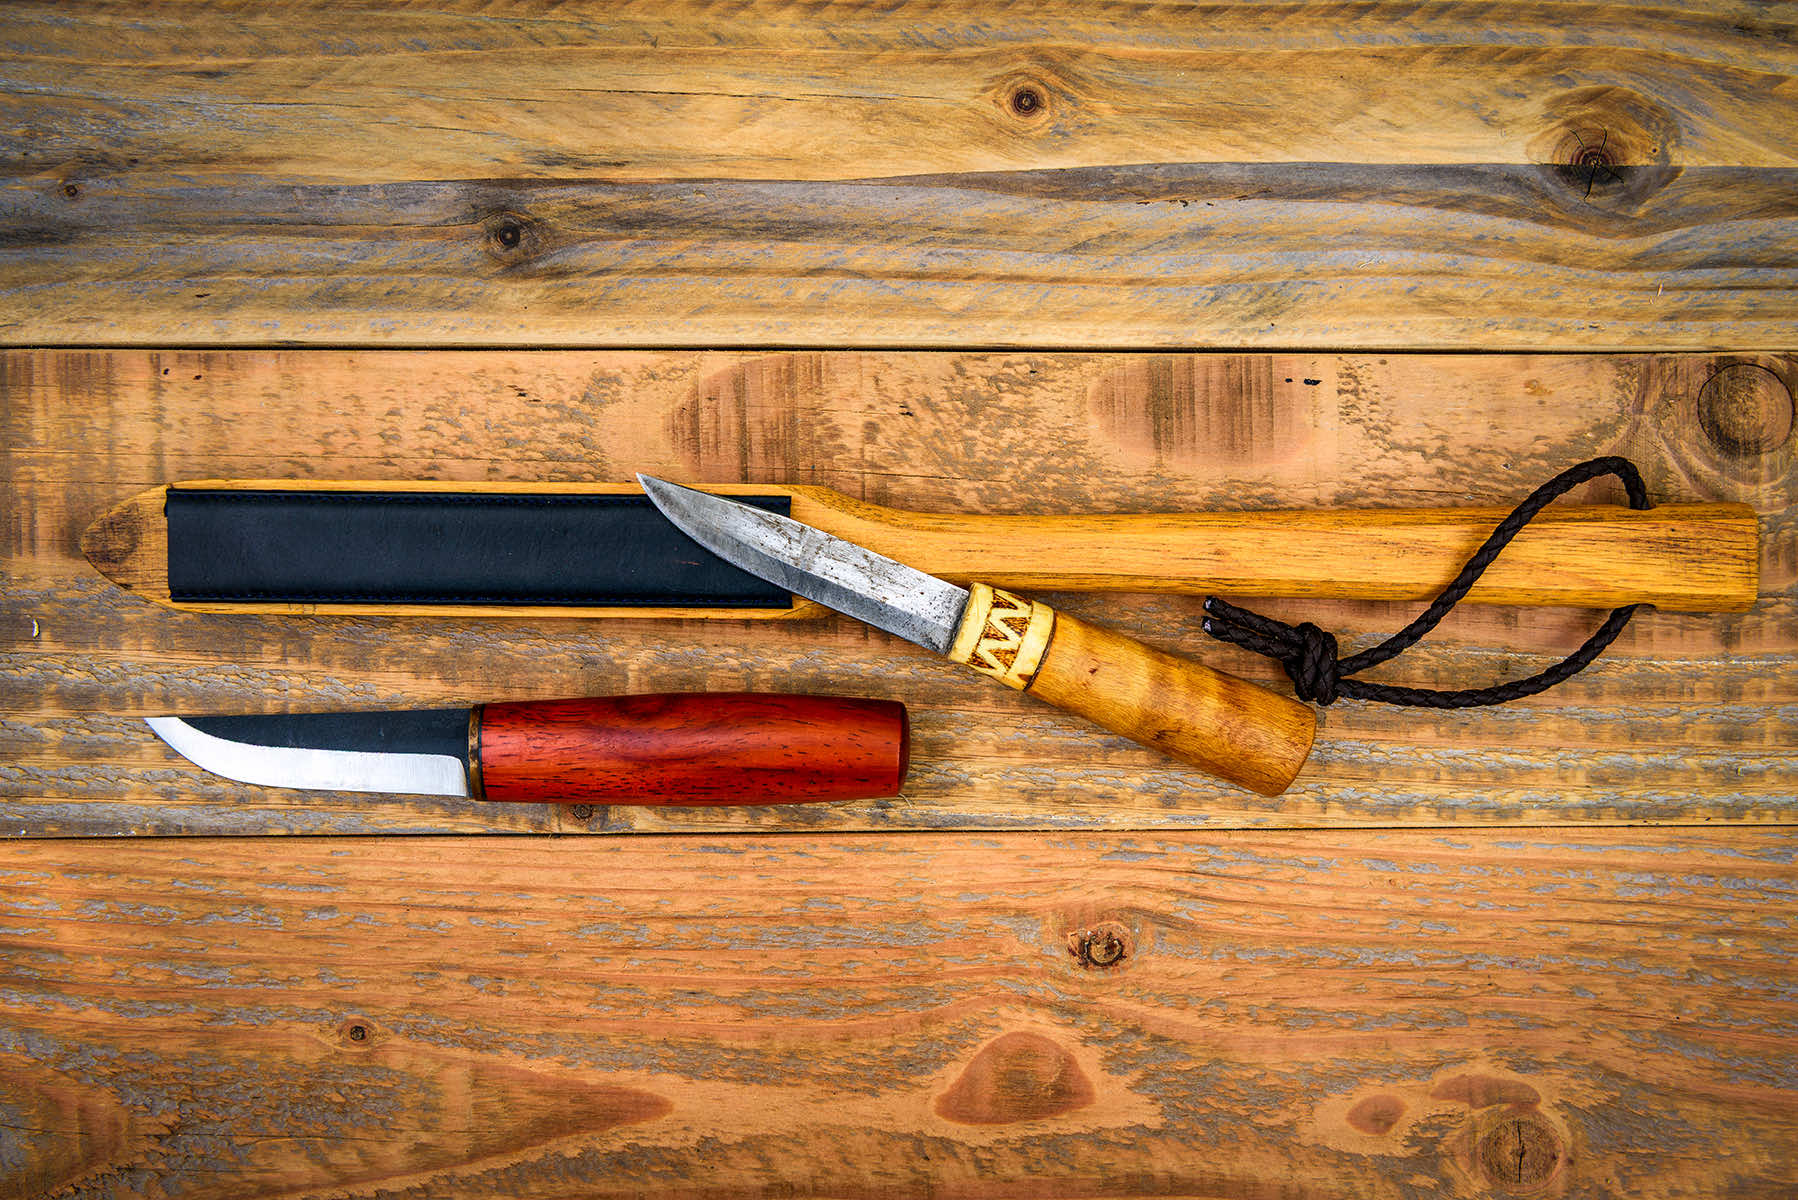
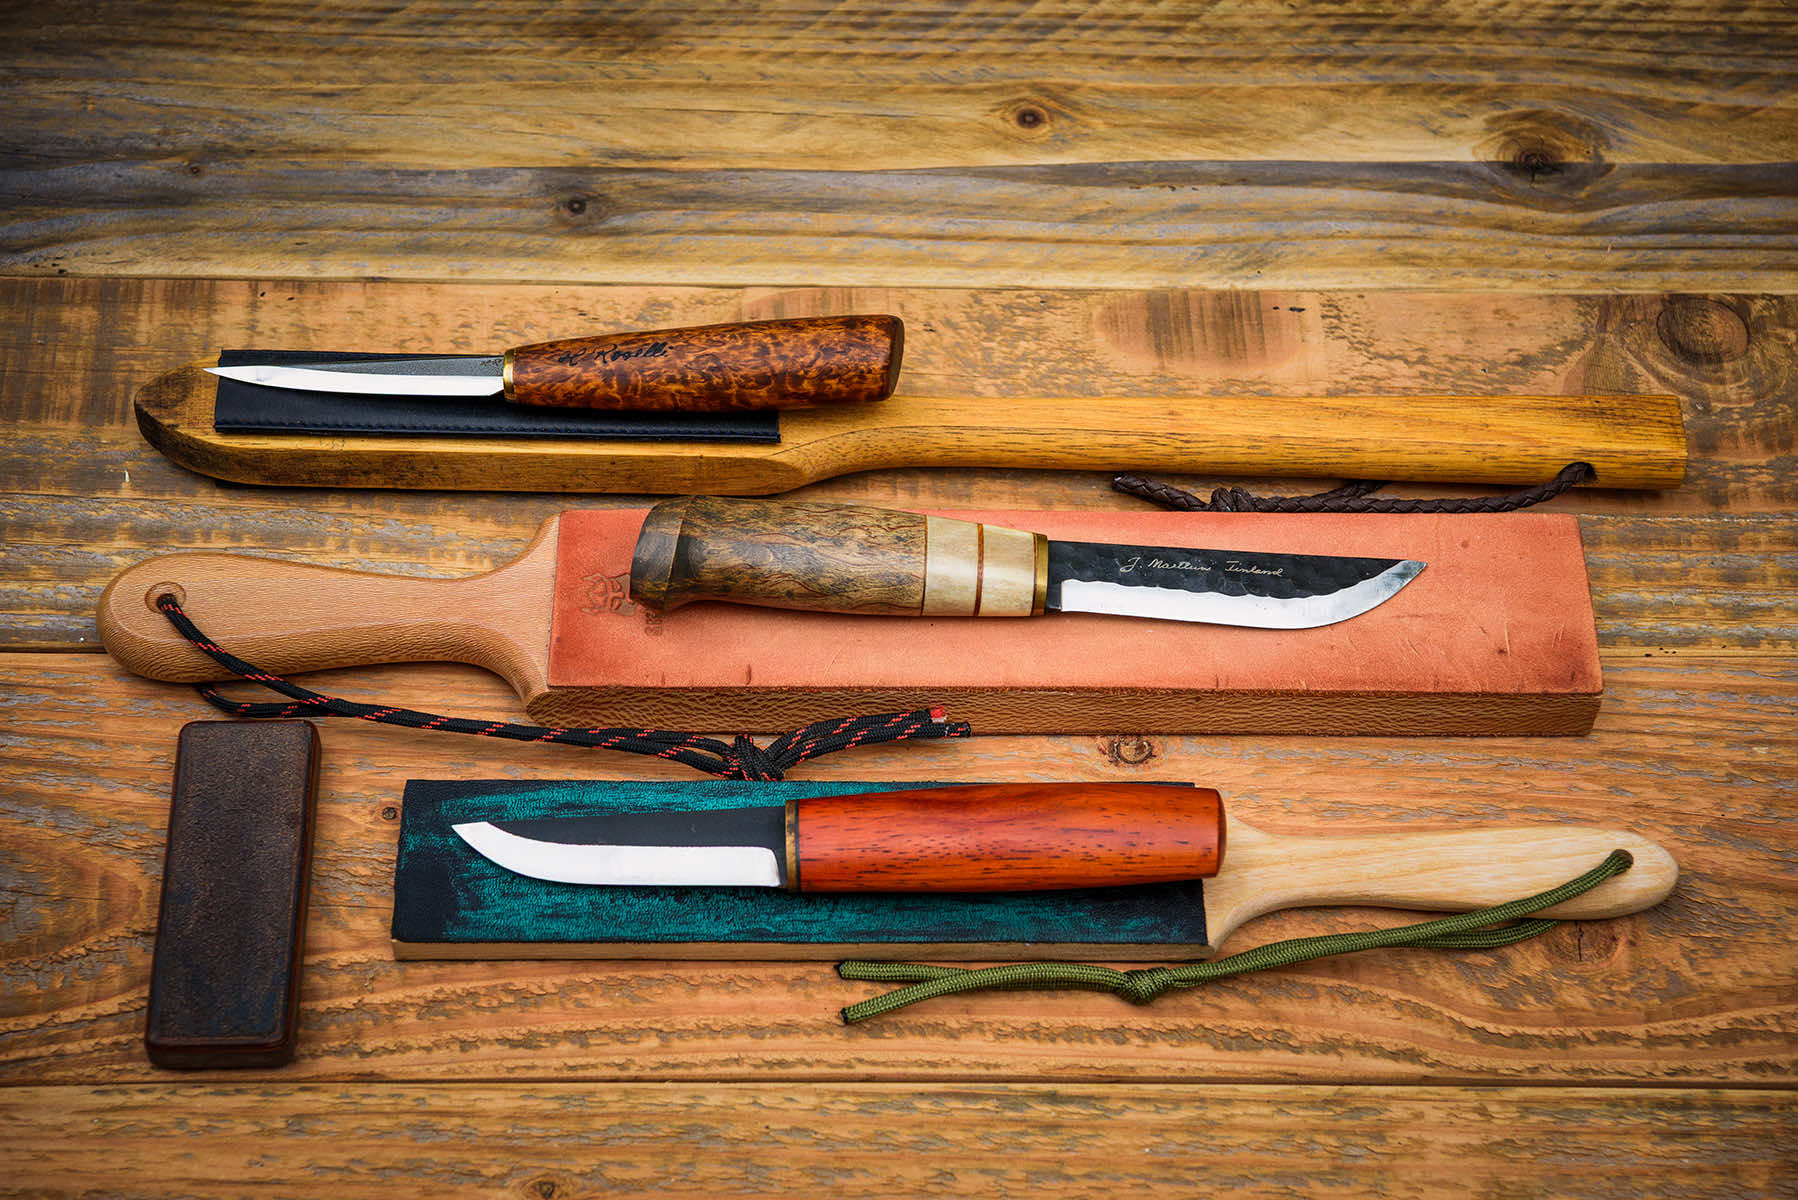
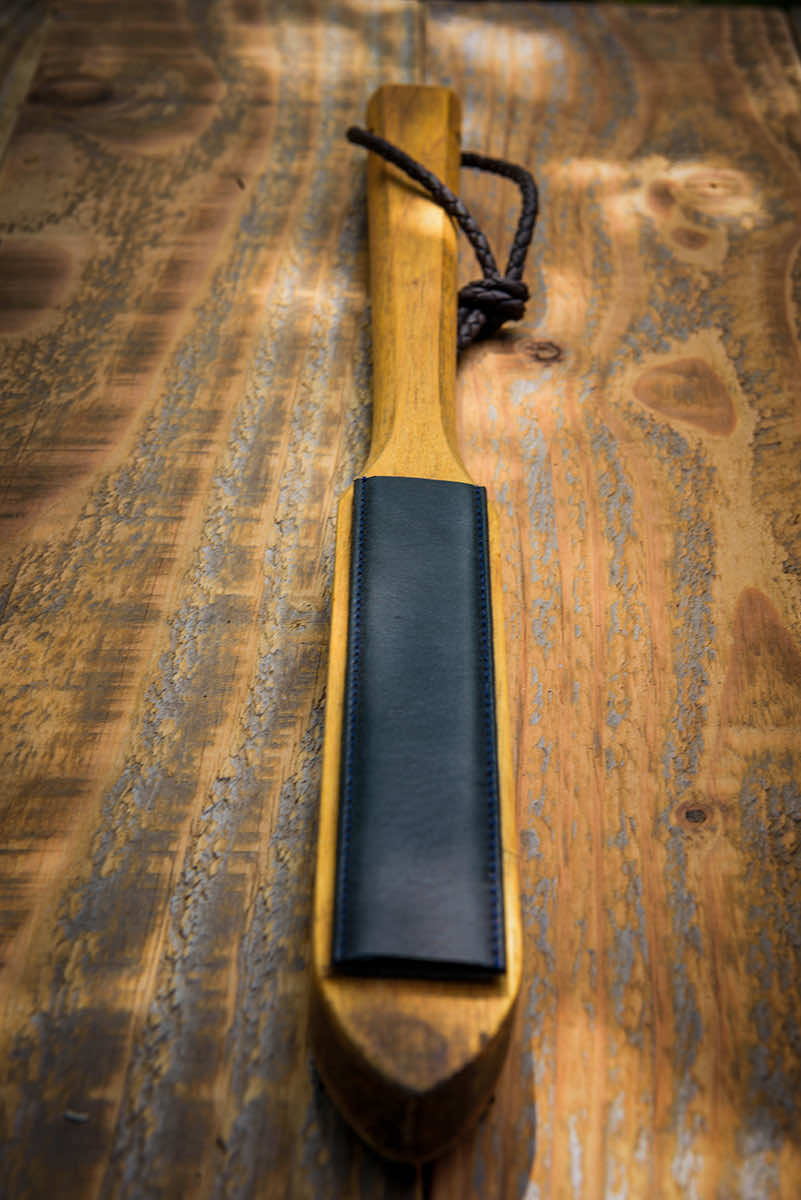
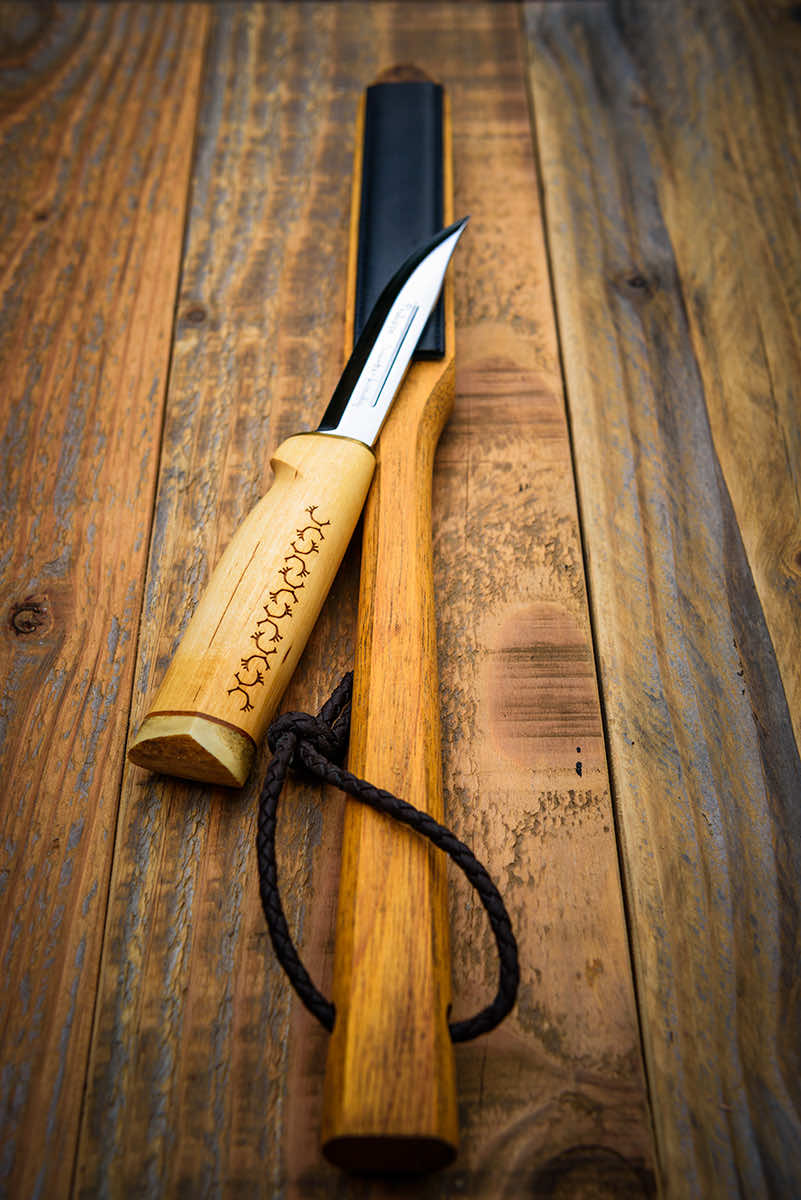
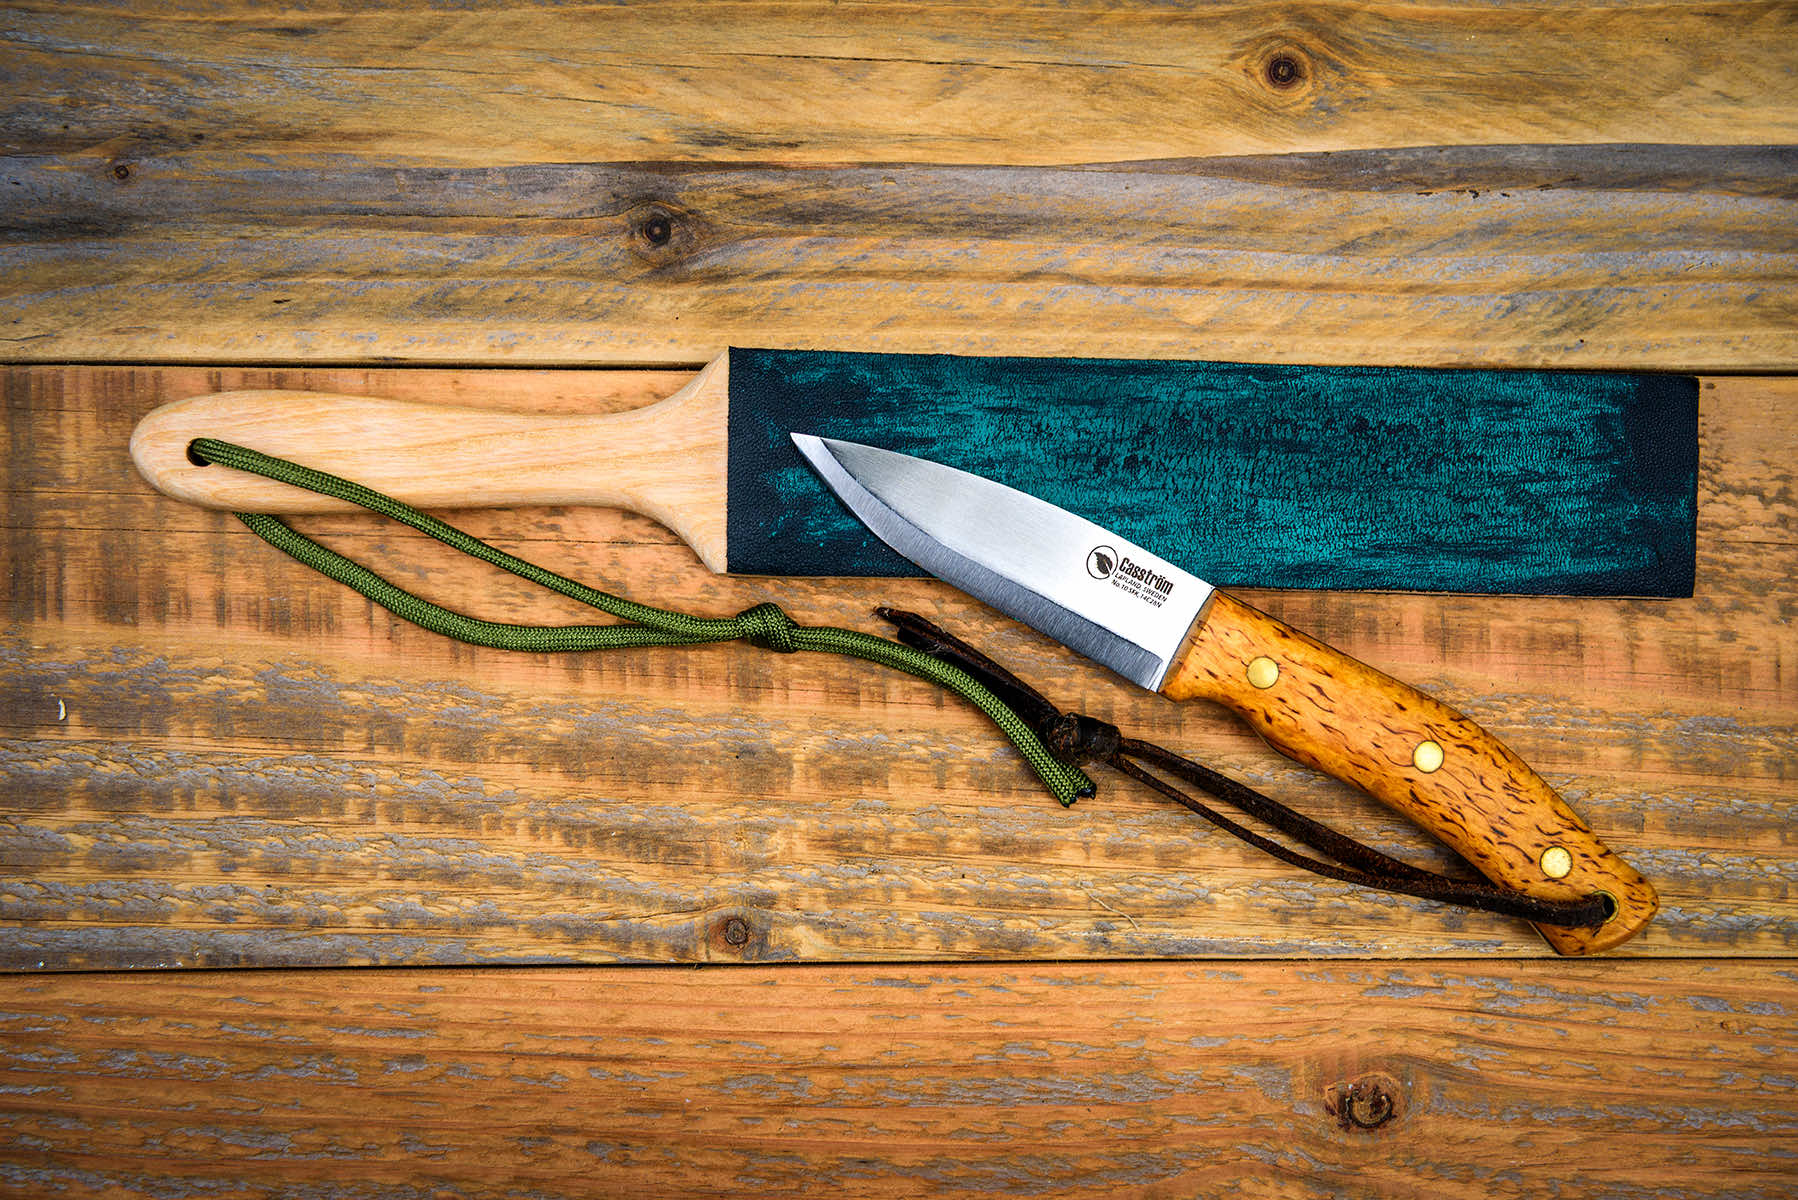
A homemade strop

Here I got an old sweep. I cut the last hair, and sanded it together. Then I glued a piece of a leather belt on both sides. It is not very wide, but it is very long and it is very convenient for blades of 12 cm and more.

STROPPING FAQ

Here is a clear and practical FAQ, prepared on basic and advanced techniques.

  • Stropping (or stropage) is a finishing technique consisting of dragging a blade onto a soft surface (usually leather) to polish the edge, realign the micro-dents and remove the residual morfil. Unlike sharpening, it hardly removes material.

    • Aguisage (stone, diamond...): reformes the bevel by removing steel.
    • Stropping: refines and polishes the already formed thread. This is the stage of finishing and running maintenance.
  • No. The bare leather already works very well for daily maintenance. Pasta (chromium oxide, diamond, CBN...) accelerates polishing and makes it possible to obtain a mirror edge, especially after fine sharpening or on super-steel.

  • Always edge trailing: The back of the blade leads the movement, the edge follows. Push the edge leading cut the leather and damage the thread.

  • The same angle as sharpening (often 15-20° for knives, flatter for straight shavers where the back remains in contact). Some lower the angle by 1-2° to avoid rounding the wire.

  • Very light: The weight of the blade is sufficient in most cases. Too much pressure rounds the edge and reduces its longevity.

  • Current maintenance: Ten to 20 passes per side.
    After sharpening or with compounds: 10-25 passes per step (from the most abrasive to the most fine), then finish on bare leather.

  • No. Avoid serrated blades (they damage the strop) and very curved shapes (curve) if you start. The smooth, straight or slightly curved blades are ideal.

  • Ideally before each shave. Wait 24 to 48 hours after last use to stabilize the wire. Never strangle immediately after shaving (risk of cracking leather with steel particles).

  • Place a very thin layer (paste, spray or emulsion), spread it evenly and let it penetrate well. Too much product crushes the strop and reduces efficiency. On a multi-sided paddle, dedicate one face per grain.

    • Chromium oxide (green): versatile and excellent for most steels.
    • Diamond (1 μm, 0.5 μm, 0.25 μm...) : very effective on super steels.
    • CBN: clean and efficient alternative.
    • Classic progression: from coarsest to thinner, then bare leather.
  • The blade must cut the suspended paper effortlessly, shave a hair easily or slice soft leather cleanly. A well stropped edge is smooth and « Hang on » clean to the touch (without never along the thread).

    • Push the edge into the leather.
    • Too much pressure.
    • Angle too high or irregular.
    • Stroke a dirty or damp blade.
    • Contaminate a fine compound with a coarser grain.
    • Kitchen knives or EDC: after each intensive use or as soon as the cut becomes less fluid.
    • Straight shavers: before each shave.

    Regular stroppage greatly prolongs the interval between two complete sharpenings.

  • Keep it clean and dry. Reload slightly as a compound when it becomes less efficient. Avoid moisture and keep it away from dust. A little light oil can sometimes restore leather flexibility.

Conclusion:

Leather stropping is the final and often underestimated stage of maintenance of a knife. While the stones to sharpen make it possible to reform and sharpen the edge, the strop refines, aligns and polishes the thread to obtain a sharper, more durable and more pleasant to use.

Well controlled,sharpening on leather significantly prolongs the duration between two complete sharpenings on stone. It quickly restores bitrate after a few uses and allows to reach a level of finish that is not easily accessible with stones alone, especially when it is combined with a quality abrasive compound (such as green chrome oxide).

The key lies in regularity and lightness: a minimum pressure, a constant angle and always the back of the blade first. Whether you choose a strop suspended for a better feeling or a paddle for more stability, the main thing remains the consistency in the technique.

In short, strop is not a gadget, but a real maintenance tool. Integrated into a simple and regular routine, it turns a correct edge into an exceptional edge, while preserving the blade over the long term.

Thank you for browsing this article, if you don't want to miss the following, subscribe to the newsletter (it's just below).

To complete this article :

Warm regards,


Subscribe to the newsletter.

Not to miss anything, you can subscribe to the newsletter to be notified of next updates.


    EnglishenEnglishEnglish